Why Metal Siding Installation is the Smart Choice for Delaware Homeowners
Metal siding installation offers homeowners an exceptional combination of durability, low maintenance, and modern appeal. For Delaware homeowners seeking high-quality exterior services, understanding the process is key to project success and making informed decisions.
Key Benefits:
- Lifespan: 40-70 years with proper installation
- Weather resistance: Withstands Delaware’s coastal storms and temperature swings
- Fire safety: Non-combustible material protects your home
- Pest proof: Won’t rot, warp, or attract insects like wood siding
- Low maintenance: Simple cleaning with water and mild detergent
- Energy efficient: Can reduce heating and cooling costs
Installation Overview:
- Choose your metal profile (corrugated, standing seam, or board and batten)
- Prepare the wall surface and install weather barriers
- Install trim pieces and starter strips
- Mount panels with proper fastening techniques
- Complete with corner caps and final inspection
While metal siding requires more precision than vinyl, the long-term benefits are significant. Steel siding, in particular, offers superior protection against moisture, pests, and rot, maintaining its appearance for decades.
I’m Richard McCain, owner of First State Roofing & Exteriors, with over 20 years of hands-on experience in metal siding installation and exterior solutions across Delaware. My team and I have guided countless homeowners through successful siding projects, from material selection to final inspection.

Gearing Up: Essential Tools and Metal Siding Profiles
Success in your metal siding installation starts with choosing the right siding profile and gathering the proper tools. If you partner with professional exterior contractors, they handle all prep work, but understanding these basics helps you make informed decisions.
Choosing Your Armor: Metal Siding Profiles
Each metal siding profile offers a unique aesthetic and distinct benefits.
Corrugated panels feature a distinctive wavy design, offering incredible strength and durability at a budget-friendly price. They are a popular choice for modern residential and industrial-look homes.
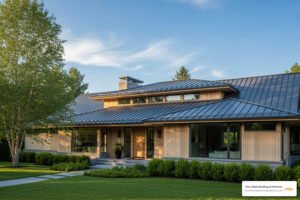
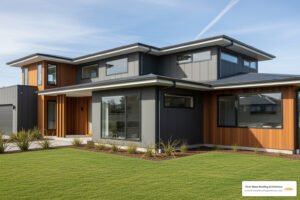
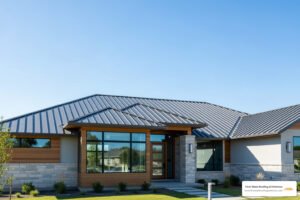
Standing seam panels provide clean, uninterrupted lines with concealed fasteners for a sleek appearance and superior weather protection. This profile is ideal for contemporary Delaware homes.
Board and batten style offers classic farmhouse charm with metal’s performance. The alternating wide and narrow panels mimic traditional wood siding without the high maintenance.
Flush wall panels deliver an ultra-minimalist aesthetic. These flat, smooth panels create a seamless look perfect for contemporary architecture and sophisticated statements.
For materials, steel siding is the heavyweight champion, offering exceptional durability and a 40-70 year lifespan. It provides superior protection against moisture, pests, and rot. Aluminum siding is a lightweight, corrosion-resistant alternative, valuable in Delaware’s coastal salt air.
Today’s metal siding comes in a wide range of colors with specialized coatings and warranties up to 35 years, ensuring your chosen color stays vibrant. For more details, see our guide to exterior siding options.
 - metal siding installation")
Assembling Your Toolkit
A successful metal siding installation depends on having the right tools ready.
- Safety Equipment: Heavy-duty gloves, safety glasses, sturdy work boots, and hearing protection are non-negotiable.
- Measuring Tools: A tape measure, 4-foot level, and chalk line are essential for accuracy. Remember: measure twice, cut once.
- Cutting Tools: A circular saw with a metal-cutting blade is for straight cuts, while tin snips or electric shears are for detailed work and notches.
- Fastening Tools: You’ll need a reliable screw gun or drill, galvanized screws with rubber washers, a rubber mallet, and a caulk gun.
- Foundation Materials: A weather-resistant barrier (WRB) like house wrap and 1×3 or 1×4 furring strips are crucial for protection and ventilation.
Having everything ready prevents a frustrating, stop-and-go project. If you’d rather skip the tool gathering, call us at (302) 222-4065 for a free estimate and inspection.
The Foundation: Preparing for a Flawless Installation
Proper preparation is the difference between a professional-looking job and a DIY disaster. This phase ensures your metal siding installation will be straight, secure, and weatherproof for decades. Taking your time now saves headaches and costly repairs down the road.
Inspecting and Prepping the Wall Surface
Before any panels go up, your walls must be ready. This step is crucial for a lasting installation.
First, conduct a thorough inspection of your exterior walls for rot, mold, or structural damage. Address these issues immediately by replacing rotten wood and seeking professional help for structural problems. Your home’s foundation must be solid.
Next, clean the surface by removing all dirt, grime, and loose paint. A clean surface ensures your weather-resistant barrier adheres properly and prevents trapping moisture or contaminants.
Remove old fixtures like gutters, downspouts, and light fixtures that may obstruct your work. Tie back any shrubbery to give yourself clear access.
Finally, create a smooth substrate. The goal is an even surface. Shim out low spots or apply furring strips to create a flat plane, which prevents the new metal siding from looking wavy.
Applying a Weather-Resistant Barrier and Furring Strips
This layer of protection is essential for your home’s long-term performance.
Installing house wrap is non-negotiable. This breathable material acts as a second line of defense against moisture, allowing vapor to escape while keeping water out. Install it shingle-style from bottom to top, overlapping seams and sealing all joints with approved tape.
Furring strips are vital for vertical metal siding. Install these thin wooden strips horizontally, typically spaced 16 inches on-center. They create an even surface and, more importantly, establish a rainscreen gap between the weather barrier and the siding. This air space allows moisture to drain and the wall to dry, preventing rot and mold. It also improves your home’s thermal performance.

This meticulous preparation is what makes a metal siding installation last for decades. If you’re feeling overwhelmed, our siding installation services handle every detail with professional precision.
The Main Event: A Step-by-Step Metal Siding Installation Guide
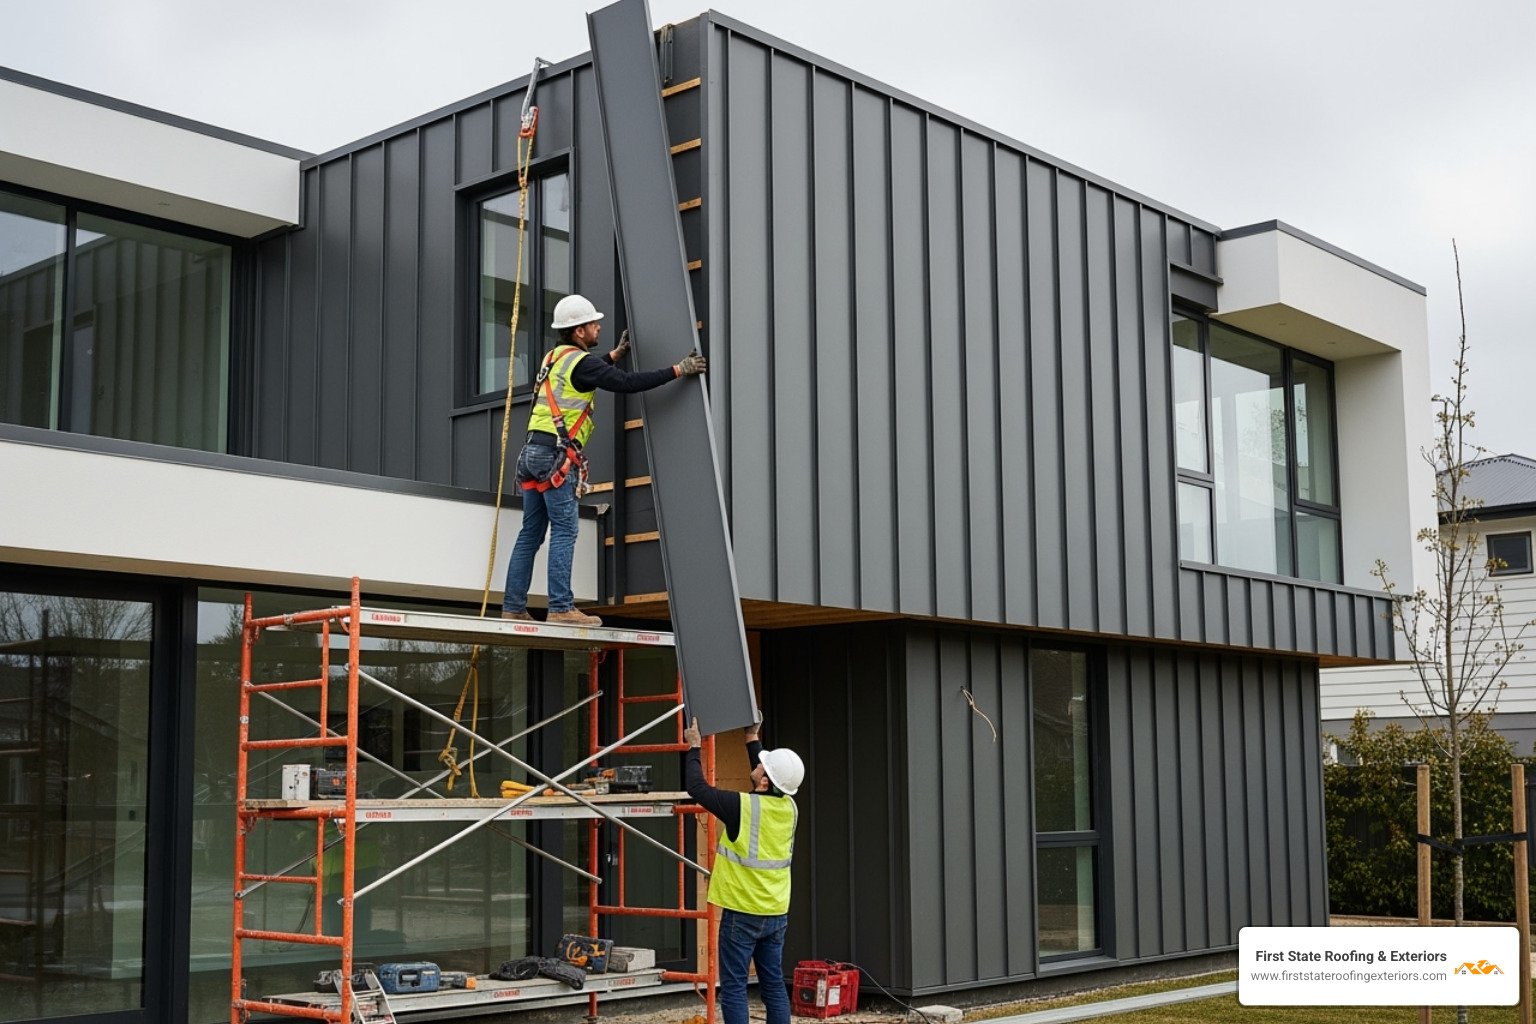
With your wall prepped, it’s time to hang the metal panels. Metal siding installation requires precision, and following these steps will help you achieve a professional finish.
Measuring, Cutting, and Installing Trim
The rule “measure twice, cut once” is essential for metal siding, as mistakes are difficult to correct. Accuracy is key.
Take accurate measurements for each panel. For cutting, a circular saw with a metal-cutting blade works well for long, straight cuts. Use tin snips or electric shears for trickier notches around obstacles. Always wear safety glasses and hearing protection.
Install the starter strip first. It must be perfectly level, as it guides all subsequent panels. Double-check with your level to ensure a straight finish.
Next, install J-channel around windows and doors. These trim pieces create finished edges for siding panels to slide into. Leave a 1/4-inch expansion gap at each end to allow the metal to expand and contract with temperature changes, preventing buckling.
Install corner posts before the siding panels, ensuring they are perfectly plumb. When sliding panels into the corners, leave about a 1/16-inch space for thermal expansion.

Best Practices for Your Metal Siding Installation
Your first panel sets the standard, so ensure it is perfectly plumb and level. Lock its bottom edge securely into the starter strip.
For subsequent panels, proper overlapping is critical for weather resistance. Most manufacturers recommend a 3/8-inch to 5/8-inch overlap, but always check your product guidelines. This is your primary defense against driving rain.
Work systematically across one wall at a time to maintain alignment. Regularly step back and check your work with a level. For better aesthetics and strength, stagger your panel joints, avoiding vertical alignment within two courses of each other.
This step-by-step video on panel sidelap and screw placement provides excellent visual guidance.
Fastening Techniques for a Lasting Finish
Proper fastening is crucial for a durable metal siding installation.
Always use galvanized screws with rubber washers to create a watertight seal and prevent corrosion. Screw placement varies by profile, so consult the manufacturer’s instructions.
Drive screws correctly: they should be straight and snug, but never over-tightened. Over-tightening deforms the metal, compromises the washer, and restricts panel movement. Leave a 1/32-inch gap between the fastener head and the siding.
Thermal movement is significant in metal siding. Fasten screws through the center of pre-slotted holes to allow panels to “float” and accommodate expansion and contraction. Space fasteners every 16 to 24 inches along the nailing flange, per manufacturer specifications.
Navigating Challenges and Finishing Touches
This phase covers handling tricky spots and applying the finishing touches that signify a high-quality job.
Common Mistakes to Avoid During Metal Siding Installation
Most common installation mistakes are easily preventable if you know what to watch for.
- Improper fastening: Screws that are too tight cause buckling, while loose screws can lead to rattling or panel loss. The right tension is snug but not tight.
- Incorrect panel overlaps: Skimping on the manufacturer-specified overlap (typically 3/8″ to 5/8″) compromises water resistance.
- Forgetting expansion gaps: Metal needs room to move. Small gaps at J-channels and corner posts prevent buckling during temperature swings.
- Inaccurate measurements: The “measure twice, cut once” rule prevents wasted material and an amateur appearance.
- Skipping surface preparation: An uneven or damaged substrate will show through the new siding, creating waves and compromising the installation.
- Out-of-plumb panels: If the first panel isn’t perfectly vertical, every subsequent panel will compound the error. Use your level on every panel.
Long-Term Care for Your New Siding
Metal siding is remarkably low-maintenance, but a little annual attention will protect your investment for the long term.
- Simple cleaning: An annual wash with water and mild detergent is usually all that’s needed. Use a soft-bristled brush or a pressure washer on a gentle setting.
- Annual inspections: Each year, walk around your home and look for scratches, dents, or loose fasteners. Catching issues early prevents major problems.
- Touch-up paint: For scratches on steel siding, promptly use manufacturer touch-up paint to prevent oxidation and maintain the siding’s protective qualities.
- Proper drainage: Ensure gutters are clean and downspouts are functioning to keep water away from your foundation. Keep vegetation trimmed back from the siding.

For comprehensive guidance, our siding exterior maintenance tips provide detailed seasonal checklists.
Frequently Asked Questions about Metal Siding
Here are answers to the most common questions we hear from Delaware homeowners considering metal siding installation.
How does metal siding compare to vinyl siding?
This is a common and important question. While both are popular options, they have key differences:
- Durability: Metal siding lasts 40-70 years, while quality vinyl lasts 30-40 years. Metal better withstands Delaware’s weather, which can make vinyl brittle over time.
- Installation: Vinyl is more forgiving of small errors. Metal requires more precision, especially with thermal expansion and cutting.
- Cost: Metal typically has a higher upfront cost, but its longer lifespan and minimal maintenance often make it more economical over the long term.
- Maintenance: Both are low-maintenance. Metal maintains its appearance better than vinyl, which can fade. Metal may need touch-up paint if scratched, while vinyl damage often requires panel replacement.
- Aesthetics: Metal offers more modern options like standing seam and flush panels, while vinyl primarily offers traditional lap siding looks.
- Protection: Metal is non-combustible and impervious to pests and rot, making it a clear winner for home protection.
For those still considering vinyl, our vinyl siding page offers more information.
What are the main benefits of choosing steel siding?
Steel siding is a favorite for its many advantages:
- Exceptional Durability: Steel resists impacts from hail that would dent aluminum or crack vinyl. Its 40-70 year lifespan is a proven reality.
- Low Maintenance: An annual wash is all that’s needed to keep steel siding looking fresh. No painting or staining required.
- Superior Protection: It provides peace of mind with excellent defense against moisture, pests, and rot.
- Modern Aesthetics: Steel comes in vibrant, long-lasting colors and finishes that dramatically boost curb appeal.
- Energy Efficiency: Many steel siding products reflect heat, helping to lower cooling costs in the summer.
When should I hire a professional for installation?
While DIY is possible, professional installation is often the best choice in certain situations:
- Complex Architecture: Homes with multiple stories, intricate angles, or many dormers require a level of precision best handled by professionals.
- Lack of Tools/Experience: The cost of specialized tools for a one-time project can be substantial. Professionals already have the necessary equipment and expertise.
- Time Constraints: A professional crew can complete a project in 1-2 weeks, whereas a DIY job can stretch on for much longer.
- Warranty Compliance: Many manufacturers require professional installation to honor their product warranties.
- Project Overwhelm: If a project feels beyond your comfort zone, it’s wise to call in experts.
If you’re considering professional help, call us at (302) 222-4065 to schedule a free inspection and estimate.
Conclusion: Protecting Your Home’s Exterior
You now have a complete overview of metal siding installation, from material selection to finishing touches. A proper installation is an investment that delivers decades of protection, energy efficiency, and curb appeal. The longevity of metal siding offers real value for Delaware homeowners who appreciate long-term thinking.
Is DIY right for you? If you are skilled with tools and have the time for a challenging project, installing your own metal siding can be very rewarding and save on labor costs.
However, this is not a simple weekend project. It demands precision, specialized tools, and patience. Errors in measurement or fastening can lead to costly repairs, and managing thermal expansion requires careful attention to detail.
When professional help makes sense: For complex homes or if you’re on a tight timeline, professional installation is often more cost-effective. For Delaware homeowners who want the peace of mind that comes with expert craftsmanship, First State Roofing & Exteriors brings over 20 years of hands-on experience to every project. We understand Delaware’s climate and install metal siding that stands up to it all.
The bottom line? Whether you choose DIY or hire professionals, you’re making a smart investment in your home’s future. Metal siding is about protecting what matters most.
Ready to get started? We offer free estimates and honest project assessments. Call us at (302) 222-4065 to schedule a free inspection. We’ll help you determine the best path for your needs and timeline.