Why Your Roof’s Ridge is its First Line of Defense
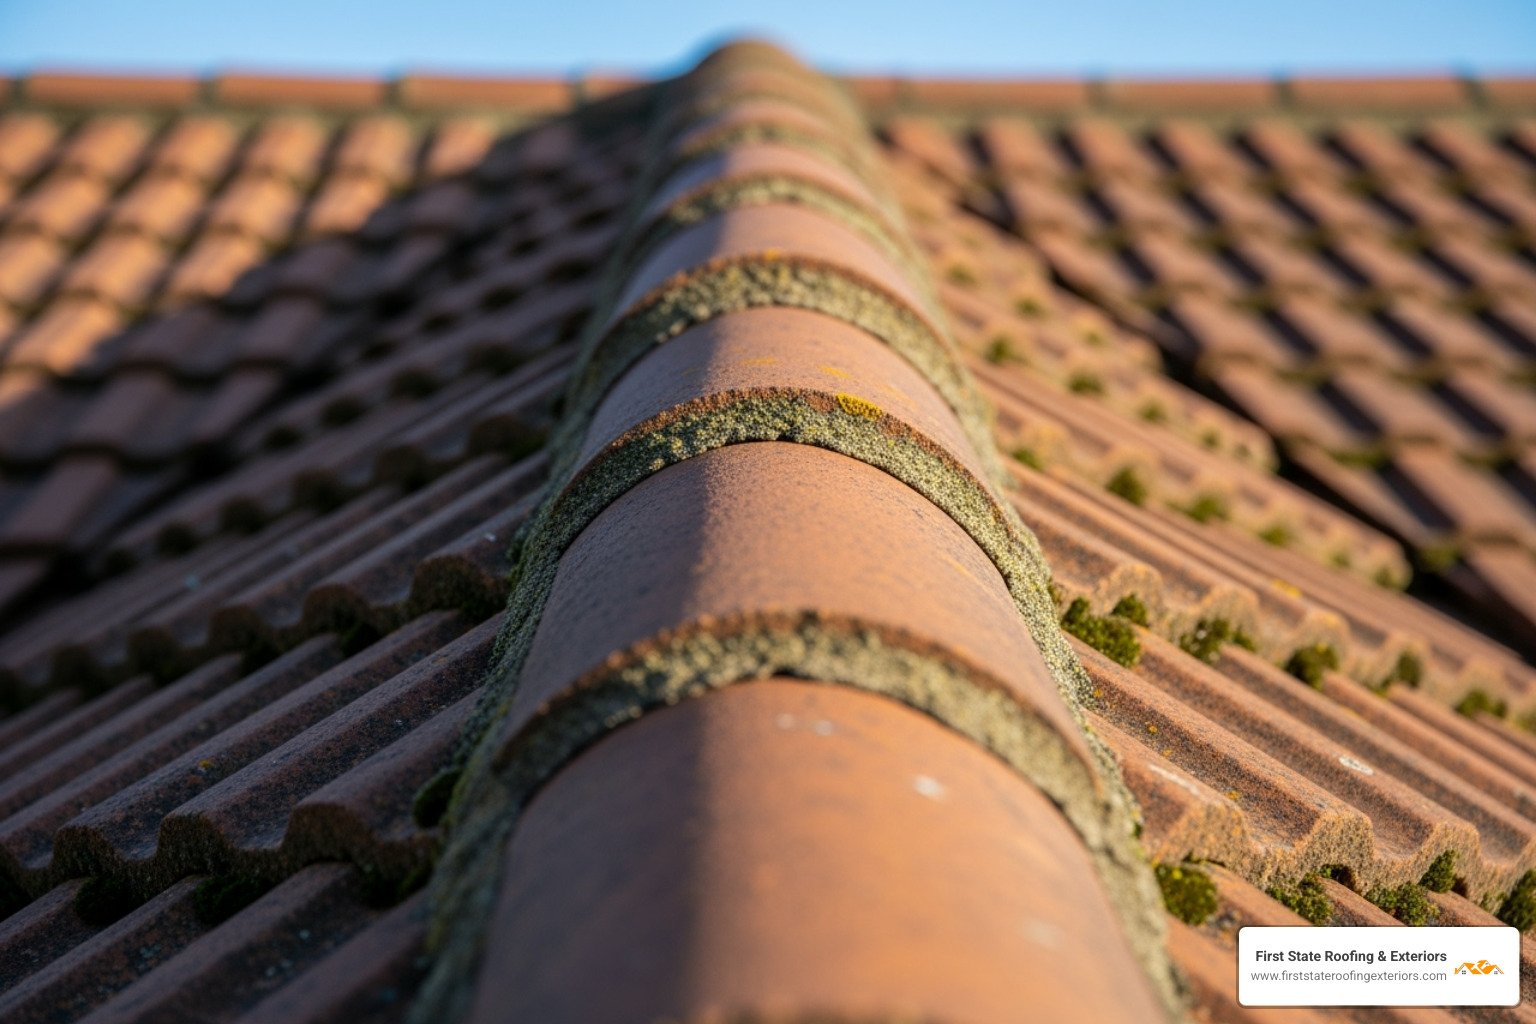
Fixing ridge tiles prevents leaks and wind damage at the most exposed point of a pitched roof. These tiles sit at the apex where two roof slopes meet, forming the weatherproof seam that blocks wind-driven rain. For Delaware homeowners, a secure ridge is a high-ROI maintenance priority that protects the entire roof system. If you need a trusted Delaware roofing contractor, our team at First State Roofing & Exteriors delivers code-compliant repairs with proven materials and methods.
Prompt ridge tile maintenance is both a structural safeguard and an energy saver. The combination of extreme weather, thermal cycling, and age causes mortar to become brittle and tiles to crack or slip. Modern standards, such as the UK’s BS 5534:2014+A2:2018, recognize these challenges by requiring mechanical fixings; mortar alone is no longer considered sufficient in high-exposure conditions.
Whether you need a precise repair or a full ridge system upgrade, understanding your options helps you protect your home effectively. For reliable roof repair services, First State Roofing & Exteriors provides comprehensive solutions backed by local experience and manufacturer-approved practices. For expert guidance and a free estimate, call us at (302) 222-4065 to schedule your no-obligation roof inspection.

Spotting the Trouble: Signs Your Ridge Tiles Need Attention
Your roof usually provides clear warning signs before a small ridge tile issue becomes a major problem. Recognizing these signs early allows you to address them before they lead to expensive emergency repairs. At First State Roofing & Exteriors, we’ve learned to spot trouble from a mile away.
Key Warning Signs:
- Visible Damage: Look for cracked, slipped, or loose tiles. Even hairline cracks can allow water to penetrate, expanding during freeze-thaw cycles. A tile that has shifted out of alignment is a prime candidate for being blown off in high winds.
- Deteriorating Mortar: If you see missing mortar or find chunks of it in your gutters or yard, the adhesive holding your tiles is failing. Aging mortar becomes brittle and crumbles, leaving gaps for wind-driven rain.
- Interior Evidence: Water stains on ceilings, especially on the top floor, are a definitive sign that water has breached your roof’s defenses. Active interior leaks are a crisis that requires immediate professional attention, as the visible water is often just a fraction of the moisture trapped in your attic and roof structure.
- Secondary Issues: Gaps in the ridge can become pest entry points for squirrels, birds, and insects. They can also lead to reduced energy efficiency as conditioned air escapes, causing a noticeable increase in your utility bills.

When to Inspect and What to Do
Strategic inspections help you catch problems early. Always perform a visual check from the ground after severe weather like high winds or hail. An annual roof inspection, ideally by a professional, should also be on your maintenance calendar, especially in Delaware’s climate with its frequent precipitation. Other good times to look up are during gutter cleaning or if you notice tile or mortar debris in your yard after a storm event.
Once a problem is spotted, the question becomes repair or replace. An isolated crack in a single tile may only require a simple repair or individual tile replacement. However, widespread mortar failure or multiple missing tiles suggest a systemic issue. In these cases, patching is a temporary fix at best; the entire ridge system is likely compromised and may require a complete re-bedding or an upgrade to a modern dry-fix system. If you notice sagging roof lines, you could be facing underlying structural issues that demand immediate professional assessment. A thorough inspection can determine if you need a simple leaky roof fix or a full ridge tile replacement.
For a professional evaluation and a free estimate, call us at (302) 222-4065 to schedule your free inspection.
A Tale of Two Methods: Dry Fix vs. Mortar for Fixing Ridge Tiles
When fixing ridge tiles, the choice boils down to two primary methods: traditional mortar bedding and modern dry-fix systems. Mortar is the classic approach, while dry-fix systems are the new standard, designed for superior performance and longevity. At First State Roofing & Exteriors, we have extensive experience with both methods, allowing us to recommend the best solution for your Delaware home.

The Traditional Approach: Mortar Bedding
This age-old method uses a cement-based mixture to bed the tiles onto the roof’s apex. The correct mortar mix ratio is critical: 3 parts sharp sand to 1 part cement. This creates a strong bond, and the joints are then “pointed” (smoothed) to shed water. However, mortar’s main weakness is its tendency to become brittle over time due to weathering and freeze-thaw cycles, leading to cracks and failure. While it remains the preferred choice for preserving the look of historic homes, it requires more maintenance than modern alternatives.
The Modern Standard: Dry Ridge Systems
Dry ridge systems eliminate mortar, relying on mechanical fixings to secure tiles. The system consists of a timber ridge batten fixed at the apex, a ventilated ridge roll that allows attic moisture to escape while blocking rain, and specialized clamps and screws that physically fasten each tile to the batten. This method offers superior wind resistance and flexibility, as the components can move with thermal expansion instead of cracking. Crucially, it complies with modern building codes like the UK’s BS 5534:2014+A2:2018, which now mandate mechanical fixings for their improved safety and performance.
| Feature | Dry Fix Systems | Mortar-Bedded Ridge Tiles |
|---|---|---|
| Durability | Very high; resistant to weathering and thermal movement | Moderate; mortar can crack and degrade over time |
| Maintenance | Low; minimal repair needed | Moderate to high; requires periodic re-pointing |
| Ventilation | Excellent; incorporates continuous roof ventilation | Poor; creates a sealed ridge, limiting airflow |
| Weather Resistance | Superior; mechanical fixings prevent dislodgement | Good initially, but weakens as mortar degrades |
| Installation Speed | Faster and less weather-dependent | Slower; requires specific weather conditions to cure |
| Building Code Compliance | Meets modern standards | May require additional mechanical fixings to comply |
The best method depends on your home’s style, age, and your long-term goals. For a free estimate and expert recommendations, call us at (302) 222-4065 to schedule your free inspection.
How-To Guide: An Overview of Ridge Tile Installation
Understanding the process of fixing ridge tiles helps you appreciate the skill involved, whether you’re considering a DIY repair or hiring a professional. This guide outlines the key stages for both mortar and dry-fix methods.
Safety First!
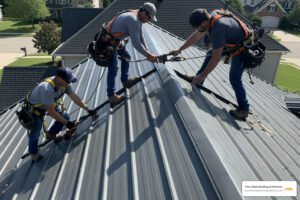
Working on a roof is inherently dangerous. Always prioritize safety by using a securely placed ladder that extends three feet above the eaves, or preferably, stable scaffolding. On any pitched roof, an OSHA-compliant safety harness attached to a secure anchor point is essential. Wear non-slip footwear and never work in wet, windy, or icy conditions. Roofing should never be a solo activity; always have a spotter on the ground.
Preparing the Roof Ridge
Proper preparation is the foundation of a lasting repair. This involves:
- Removing Old Materials: Carefully use a hammer and chisel to break away old mortar and remove the old ridge tiles. Work gently to avoid damaging the underlying roof structure.
- Cleaning the Surface: Thoroughly clean all loose mortar, dust, and debris from the ridge area with a stiff wire brush. A clean surface is crucial for proper adhesion.
- Inspecting the Underlayment: With the ridge exposed, check the roofing felt or membrane for tears or deterioration. Repair any minor damage before proceeding.
- Installing the Ridge Batten (for Dry-Fix): For a dry-fix system, a timber batten must be securely fixed along the apex to serve as the anchor for the new tiles.
Fixing Ridge Tiles with Mortar: The Process
This traditional method relies on a skilled application of a specialized mortar mix.
- Mix the Mortar: Combine one part cement with three parts sharp sand, adding water until you achieve a stiff, workable consistency.
- Apply the Mortar Bed: Apply a generous, even bed of mortar (about an inch thick) along the prepared ridge line.
- Embed the Tiles: Press the first ridge tile firmly into the mortar, ensuring it is level and properly aligned. This first tile sets the line for the rest.
- Point and Finish: Remove excess mortar and smooth the joints (fillets) with a pointing trowel to create a neat, watertight seal. Continue this process, ensuring a consistent overlap between each tile, and allow the mortar to cure for at least 24 hours, protected from rain.
Fixing Ridge Tiles with a Dry Ridge System: The Process
This modern method uses mechanical components for a secure, ventilated, and maintenance-free finish.
- Install the Ventilated Roll: Unroll the specialized membrane along the ridge batten, securing it in place. The roll’s adhesive edges create a seal with the roof tiles below while the center mesh allows ventilation.
- Position Unions and Tiles: Place ridge unions (connectors) along the batten to guide spacing and provide fixing points.
- Mechanically Fix the Tiles: Place each ridge tile over the union and use the system’s specialized clamps and screws to fasten it securely to the ridge batten. This physical connection provides exceptional resistance to wind uplift.
- Finish the Ends: Install stop-end caps at each end of the ridge to provide a clean, weatherproof finish.
Whether you’re tackling a small repair or need a full system installation, understanding these steps is key. For professional help and a free estimate, call First State Roofing & Exteriors at (302) 222-4065 for a free inspection.
DIY vs. Professional: When to Call for a Roof Repair Expert
While the satisfaction of a DIY project is undeniable, fixing ridge tiles is a job where the risks can easily outweigh the rewards. One misstep can lead to serious injury or costly water damage. Knowing when to tackle a job yourself versus calling a professional is crucial.
A DIY approach might be feasible for replacing a single, easily accessible cracked tile on a low-pitched roof. However, you should call a professional for:
- Complex Projects: Widespread mortar failure, multiple missing tiles, or upgrading from a mortar to a dry-fix system involves complexities best handled by an experienced roofer.
- Steep or High Roofs: Working on roofs with a steep pitch (greater than 4:12) or significant height requires professional safety equipment and training. Falls from roofs are a leading cause of serious injury.
- Extensive or Structural Damage: If you see signs of damage beyond the tiles themselves—such as to the underlayment, sheathing, or rafters—you are dealing with a structural issue. A spongy feel underfoot or a sagging roofline demands immediate expert assessment.
- Warranty Protection: Professional repairs come with warranties on materials and workmanship. A failed DIY repair means you pay twice: once for your materials and again for the professional fix.
For homeowners needing roof repair in Dover, Delaware, a local expert understands the challenges of our coastal climate. This knowledge, which can’t be learned from online videos, is invaluable.
Common DIY Pitfalls & Professional Solutions
Even determined DIYers can run into common problems that professionals are trained to avoid:
- Mismatched Tiles: Finding an exact match for an older tile’s profile and color is difficult and requires access to specialty suppliers. An improper fit can look bad and create gaps for water entry.
- Improper Mortar Mix: The 1:3 cement-to-sand ratio is precise. Too weak, and it crumbles; too strong, and it can crack the tiles themselves during thermal expansion.
- Poor Alignment: A perfectly straight and level ridge line is harder to achieve than it looks. Misalignment can create areas where water pools, leading to premature failure.
- Ignoring Underlayment Damage: Professionals always inspect the underlayment beneath the ridge tiles. Covering up existing water damage to this layer will guarantee future leaks.
- Inadequate Ventilation: When installing a dry-fix system, ensuring the ventilated roll functions correctly is critical. Improper installation can trap moisture, leading to mold and rot in the attic.
If you have any doubt, it’s always safer and more cost-effective in the long run to call an expert. We offer free estimates and honest assessments. Call us at (302) 222-4065 to schedule your no-obligation inspection.
Frequently Asked Questions about Fixing Ridge Tiles
As Delaware’s local roofing experts, we get a lot of questions about fixing ridge tiles. Here are clear, direct answers to the most common ones.
How do you replace a single damaged ridge tile without removing all of them?
Yes, a single tile can be replaced. The process involves carefully chiseling away the old mortar from around only the damaged tile, or unscrewing its fixings in a dry-fix system. After lifting the old tile out and cleaning the area, a new tile is set in a fresh bed of mortar or secured with new mechanical fixings, ensuring it is level and aligned with its neighbors.
What is the best mortar mix for ridge tiles?
The best and most recommended mortar mix for bedding ridge tiles is a ratio of 3 parts sharp sand to 1 part Portland cement. This formula provides the optimal balance of strength and flexibility to withstand weather without being so rigid that it cracks. A plasticiser can be added to improve workability, but only according to the manufacturer’s instructions.
How long do ridge tiles last?
The lifespan depends on two different components: the tiles and the fixing method. The tiles themselves (clay or concrete) are incredibly durable and can last 50 years or more. However, the fixing method has a shorter lifespan. Traditional mortar bedding typically requires re-pointing every 10-15 years as it becomes brittle and cracks. In contrast, modern dry-fix systems are designed to last as long as the roof covering itself—often 25-30 years or more—with minimal maintenance, as their mechanical fixings are not prone to weathering.
For a free estimate or to have your ridge tiles inspected, call First State Roofing & Exteriors at (302) 222-4065 for a free, no-obligation assessment.
Secure Your Roof’s Peak with Confidence
Your roof’s ridge is the frontline defender of your home, and fixing ridge tiles is not just about curb appeal—it’s about protecting your entire structure from the top down. Proactive maintenance prevents small issues from becoming catastrophic leaks and costly interior damage. You now know the signs of failure, the difference between mortar and dry-fix systems, and why this job often requires a professional touch.
While knowledge is power, the skill and safety equipment needed to work at height make professional assistance the smartest choice for most homeowners. In Delaware, where our homes see frequent precipitation throughout the year, expert installation is your best guarantee of a lasting repair. For homeowners in Smyrna, Dover, and across the state, First State Roofing & Exteriors offers expert roofing services with the integrity and transparency you expect from a local, family-owned business.
Don’t wait for a drip to become a disaster. We offer free estimates—call (302) 222-4065 to schedule your no-obligation roof inspection today.