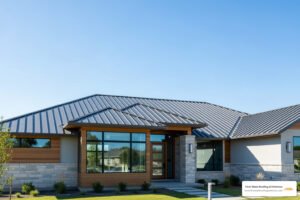
Why Asphalt Shingle Replacement Protects Your Home
An asphalt shingle replacement is a critical home improvement project that protects your property from water damage, structural decay, and energy loss. Whether dealing with storm damage, aging materials, or upgrading your home’s exterior, understanding the process helps you make informed decisions. For Delaware homeowners, First State Roofing & Exteriors offers comprehensive roofing services custom to local needs.
Quick Answer: Key Steps for Asphalt Shingle Replacement
- Inspect your roof for curling, cracking, missing shingles, or granule loss
- Tear off old shingles and underlayment down to the roof deck
- Repair any damaged decking with new plywood or OSB
- Install drip edge, ice and water shield, and underlayment
- Lay starter shingles, then install main shingles in a staggered pattern
- Add flashing around vents, chimneys, and skylights
- Cap the ridge with specialized ridge cap shingles
- Seal all exposed nails and ensure proper adhesion
Asphalt shingles are the most common U.S. residential roofing material because they are cost-effective, durable, and relatively easy to install. Architectural shingles last about 30 years, while three-tab shingles last around 20 years. However, older asphalt roofs can fail after 14 years, making timely replacement critical.
When to repair vs. replace? A simple repair may suffice for a few damaged shingles. However, widespread granule loss, multiple missing or curled shingles, or a roof aged 18-20 years often requires a full replacement.
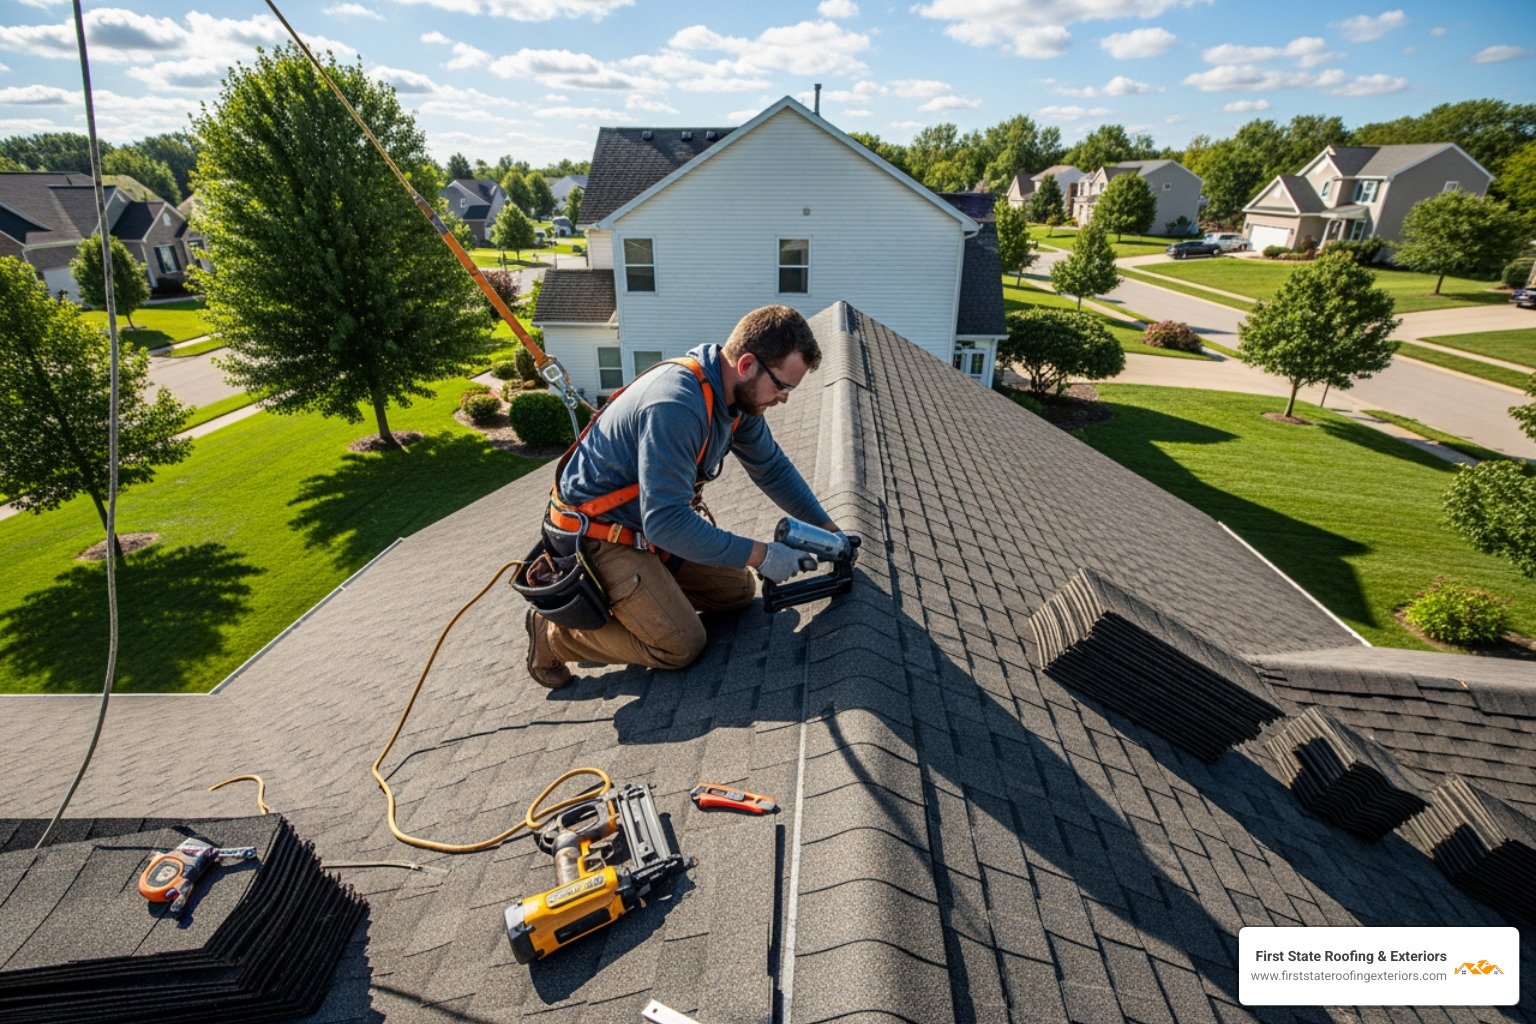
Safety is paramount. Roof work involves serious fall risks. Proper safety equipment like OSHA-compliant harnesses, non-slip footwear, and stable ladders is non-negotiable. If you lack the gear or comfort with heights, professional installation is the safest choice.
I’m Richard McCain, Owner and President of First State Roofing & Exteriors. With over 20 years of experience in Delaware, my hands-on approach ensures every asphalt shingle replacement meets the highest standards for quality, safety, and durability.

Find more about asphalt shingle replacement:
Before You Begin: Inspection, Safety, and Planning
A thorough inspection and careful planning are crucial before starting an asphalt shingle replacement. This initial phase ensures a successful and safe project.

Signs Your Asphalt Shingles Need Replacement
How do you know if your asphalt shingles need to be replaced? There are several clear indicators that your roof is nearing the end of its life.
- Curling or Cupping Shingles: Aging shingles dry out and shrink, causing them to curl or cup. This makes them brittle and vulnerable to wind damage.
- Cracked or Split Shingles: Extreme temperature changes can crack or split shingles, creating direct paths for water to enter your roof.
- Missing Shingles After a Storm: Missing shingles after a storm indicate a compromised roof needing immediate attention. High winds over 50-60 mph, as defined by the National Severe Storms Laboratory, can easily dislodge old shingles.
- Widespread Granule Loss in Gutters: Granules protect shingles from UV rays. Finding excessive granules in gutters means the protective layer is gone, and the shingles will wear out faster.
- Dark Streaks or Moss Growth: Dark streaks from algae are mostly cosmetic. However, widespread moss is more serious, as it can retain water, lift shingles, and cause leaks, shortening the roof’s lifespan.
- Roof Age Over 20 Years: Architectural shingles can last 30 years and three-tab shingles 20, but many older roofs fail after 14 years. If your roof is 18-20 years old, it’s likely time for an asphalt shingle replacement. As noted by InterNACHI’s Standard Estimated Life Expectancy Chart for Homes, elemental exposure eventually requires replacement.
If you observe these signs, a closer look is needed. A small issue can quickly escalate into costly damage.
Essential Tools and Materials
A successful asphalt shingle replacement requires the right tools and materials. Don’t skimp on quality or safety. You’ll need:
- Safety Gear: Non-negotiable. Wear an OSHA-compliant safety harness, non-slip roofing shoes, safety glasses, and gloves. A hard hat is also recommended.
- Ladder: A sturdy extension ladder for safely reaching the eaves.
- Pry Bar/Flat Bar: For lifting shingles, breaking sealant, and removing nails.
- Roofing Shovel (Tear-off Shovel): For efficiently removing old shingles.
- Hammer/Roofing Hatchet: For driving nails. A roofing hatchet also cuts shingles and has a gauge for exposure.
- Utility Knife/Hook Blades: For cutting and trimming new shingles. Hook blades are very effective.
- Chalk Line: To snap straight lines for shingle alignment.
- Measuring Tape: For accurate measurements.
- Caulk Gun: For applying roofing cement and sealants.
- Roofing Nails: Standard 1-1/4 inch galvanized, corrosion-resistant roofing nails.
- Roofing Cement/Sealant: Quality roofing cement or a durable sealant like Lexel for sealing exposed nails and tabs. Avoid sealants that dry out in sunlight.
- Replacement Shingles: Enough new shingles for the job.
- Underlayment: Synthetic underlayment or 15-lb/30-lb felt paper. We prefer 30# tarpaper for its stiffness and durability.
- Ice and Water Shield: A self-adhering membrane for vulnerable areas like eaves and valleys.
- Drip Edge: Metal flashing for eave and rake edges to direct water into gutters.
- Dumpster/Debris Bin: For disposal of old roofing materials.
Choosing the Right Replacement Shingles
Selecting the right shingles for an asphalt shingle replacement is a crucial decision affecting looks, durability, and cost.
- 3-Tab vs. Architectural Shingles:
- 3-Tab Shingles: These are flat, single-layer shingles with three tabs. They are the most affordable option with a 20-year lifespan.
- Architectural (Laminated) Shingles: Also called dimensional shingles, these are thicker, multi-layered shingles that mimic wood or slate. They are more durable, resist wind and hail better, and last 30+ years. We recommend them for better performance and curb appeal.
- Shingle Color and Curb Appeal: Shingle color greatly affects your home’s appearance and energy efficiency. Choose a color that complements your home’s exterior.
- Warranty Considerations: Warranties vary. Three-tab shingles often have 20- to 30-year warranties. Architectural versions may have “lifetime” warranties (40-50 years). Always read the fine print to understand coverage, duration, and prorated terms.
- Energy Efficiency (Cool Roofs): Delaware homeowners can reduce energy costs with “cool roofs.” These shingles use special pigments or light colors to reflect more sunlight. A light-colored roof can reduce cooling costs by up to 15 percent. The Cool Roof Rating Council rates products for solar reflectance and thermal emittance.
- Matching Existing Shingles for Repairs: For minor repairs, match the new shingle to your existing roof’s color and style. Save leftover shingles from the original installation for this purpose.
The Step-by-Step Guide to a Full Asphalt Shingle Replacement
A full asphalt shingle replacement, done correctly, ensures long-term protection for your home. Here is our approach.

Step 1: Tear Off Old Shingles and Underlayment
The goal is to strip the roof to the bare decking.
- Protect Your Property: Protect your property by moving items and using tarps to catch debris. A magnetic sweeper is essential for cleanup.
- Rent a Dumpster: Place a dumpster close to the house for efficient debris removal.
- Start Removing: Start by prying off ridge caps. Then, use a roofing shovel to remove old shingles and underlayment, working from the peak down.
- Remove All Old Nails: Critically, remove or hammer flat all old nails. Protruding nails cause leaks and are a leading cause of storm-related roof failure.
- Sweep the Roof Deck Clean: Sweep the deck clean of all debris to ensure a smooth surface for the new roof.
Step 2: Inspect and Repair the Roof Deck
The roof deck is your new roof’s foundation. A sound deck is essential for proper installation and integrity.
- Check for Damage: Inspect the bare deck (plywood or OSB) for rot, soft spots, or water damage, especially around chimneys, vents, and valleys.
- Replace Damaged Sheathing: Cut out and replace any damaged sections with new CDX plywood or OSB of the same thickness, securing it with screws or nails.
- Ensure a Solid, Flat Surface: The deck must be solid and flat. Address gaps larger than 1/4 inch. For board decks, re-decking with new sheathing is often recommended for best performance.
Step 3: Install Drip Edge and Underlayment
These layers are your first defense against water.
- Install Drip Edge: Install metal drip edge on the eaves first, then the rakes, overlapping them. Fasten with roofing nails. While not always required by code, we always install it for better protection and a finished look.
- Apply Ice and Water Shield: For Delaware’s winters, an ice and water shield is crucial to prevent ice dams. Apply this self-adhering membrane along eaves (extending 3 feet past the interior wall) and in valleys to create a watertight barrier.
- Lay Underlayment: Roll out underlayment (synthetic or felt) over the entire deck, starting from the bottom. Overlap courses by at least 2 inches and seams by 6 inches. Secure it flat with staples or cap nails to prevent ripples. This acts as a secondary moisture barrier.
Step 4: Install Starter Shingles and Main Shingles
Precision here is key for a watertight, attractive roof.
- Install Starter Shingles: Install a starter strip along the eaves, extending 1/2 inch past the drip edge. Secure with five nails to seal the edge and prevent leaks.
- Lay the First Course: Lay the first course of main shingles over the starter strip, ensuring proper alignment.
- Follow a Staggered Pattern: Lay subsequent courses in a staggered pattern to prevent leaks and improve wind resistance. Use a chalk line for straight courses. The standard reveal is 5 to 6-1/2 inches.
- Nailing: Follow the manufacturer’s nailing instructions precisely (usually 4-5 nails per shingle). Place nails above the adhesive strip so they are covered by the next course. Improper nailing is the top cause of premature roof failure.
Step 5: Flashing, Vents, and Ridge Caps
These components protect vulnerable areas and ensure proper attic ventilation.
- Flashing: Install new metal flashing around all penetrations (chimneys, skylights, vents) to divert water. For a watertight seal with step flashing, it’s best to remove siding to install it properly.
- Vents: Integrate roof vents into the shingle pattern. Cut shingles to fit snugly around the base, and seal the flashing edges and any exposed nails.
- Ridge Vent: If possible, install a continuous ridge vent along the peak for crucial attic ventilation. This lets hot, moist air escape, reducing energy costs and moisture buildup.
- Ridge Caps: Finally, cover the ridge vent and hips with specialized ridge cap shingles. These thicker shingles protect the roof’s highest points. Install them so wind blows over, not into, the overlaps.
Minor Repairs: How to Replace a Single Damaged Shingle
Sometimes, a minor asphalt shingle replacement can prevent small issues from becoming big problems. This is a common DIY task, but safety is always the priority.
Step 1: Loosen the Surrounding Shingles
Work gently and strategically.
- Choose Your Timing: Work on a cool day. The shingle sealant will be stiffer and easier to break with a pry bar, not gooey like in hot weather.
- Break the Seal: Slide a flat pry bar under the shingle directly above the damaged one to break its seal. Repeat for shingles on either side. Lift them just enough to access the nails below without causing more damage.
Step 2: Remove Nails and the Old Shingle
With surrounding shingles loose, you can access the damaged shingle’s nails.
- Expose the Nails: Lift the shingle above to expose the 4-5 nails holding the damaged one.
- Remove the Nails: Use the pry bar to pull out the nails. If you can access the attic, you can try pushing deep nails out from below.
- Slide Out the Old Shingle: With nails removed, slide the damaged shingle out.
Step 3: Install and Secure the New Shingle
Now, install the new shingle.
- Slide in the New Shingle: Slide the new, matching shingle into place, aligning it perfectly with the surrounding shingles.
- Secure with Nails: Secure the new shingle with 1-1/4 inch roofing nails in the original nail locations. Drive nails flush so they will be covered by the shingle above.
Step 4: Seal the New Shingle
This final step makes the repair watertight and wind-resistant.
- Apply Roofing Cement: Apply three quarter-sized dabs of roofing cement under the new shingle’s tabs. Press it down to create a watertight bond.
- Reseal Surrounding Shingles: Reseal any surrounding shingles you loosened by applying dabs of roofing cement under their tabs and pressing them down. This manual seal provides immediate wind resistance while the heat-activated sealant bonds over time.
For cracked shingles that don’t need full replacement, you can repair them by applying sealant under and over the crack, then pressing it down. Spreading collected granules over the wet sealant helps it blend in.
When to Call a Professional Roofer
While DIY asphalt shingle replacement can be rewarding, calling a pro is often the smartest, safest, and most cost-effective choice. First State Roofing & Exteriors can help when the job is too big or complex.
- Sagging Roof Deck: A sagging roofline indicates a serious structural issue requiring a professional contractor and possibly a structural engineer. This is not a DIY job.
- Multiple Layers of Old Shingles: If your roof already has two layers of shingles, a full tear-off is mandatory by code. This is a large project best left to pros.
- Extensive Water Damage: Widespread water damage in your attic or on ceilings points to a major leak. A pro can find the source and perform comprehensive repairs.
- Complex Roof with Many Valleys or Steep Pitch: Complex roofs with steep pitches, valleys, or dormers are dangerous for DIYers. Professionals have the right equipment and experience for these jobs.
- Lack of Safety Equipment or Comfort Working at Heights: Roofing is dangerous. If you lack proper OSHA-compliant safety gear or are uncomfortable with heights, hire a professional. Your safety is paramount.
- To Ensure Warranty Compliance: A DIY installation may void your shingle warranty. Many manufacturers require installation by certified professionals to validate their warranties.
- Time and Effort: A full roof replacement is time-consuming and physically demanding. A professional crew can often finish the job in one to three days.
For a professional roof replacement in the Dover or Smyrna areas, trust the local experts. The team at First State Roofing & Exteriors provides free estimates for all our quality roofing solutions. Call us today at (302) 222-4065 to schedule your free inspection.
Frequently Asked Questions about Asphalt Shingle Replacement
How long does an asphalt shingle roof last?
An asphalt shingle roof’s lifespan depends on shingle type, installation quality, weather, and maintenance. Standard three-tab shingles last about 20 years, while higher-quality architectural shingles can last 30 years or more. Factors like harsh weather and poor ventilation can shorten this lifespan, with some older roofs failing after just 14 years. Regular maintenance can extend your roof’s life.
Can I install new shingles over my old ones?
Installing new shingles over old ones, called a “re-roof,” is sometimes possible. However, most building codes allow a maximum of two shingle layers. This method saves on labor but hides potential deck damage like rot. A full “roof replacement,” or tear-off, allows for a complete inspection and repair of the roof deck. For best results and longevity, we always recommend a full tear-off.
What is the best time of year to replace a roof?
The best time for an asphalt shingle replacement in Delaware is during mild, dry weather, typically in late spring (April to June) or early fall (September to November). Moderate warmth is needed for the shingle adhesive to seal properly. Extreme heat can soften shingles, while extreme cold can make them brittle and prevent sealing. Planning for these temperate seasons ensures the best outcome.
Conclusion
A successful asphalt shingle replacement is a critical investment in your home’s protection, efficiency, and curb appeal. While this guide offers a DIY roadmap, safety and quality are paramount. Roofing is risky, and complex projects can be overwhelming.
If the project involves significant damage, multiple layers, a steep pitch, or is beyond your comfort level, seek professional help. The experts at First State Roofing & Exteriors provide top-quality roofing in Dover, Smyrna, and across Delaware. We offer free, no-obligation estimates to protect your home with integrity. Call us today at (302) 222-4065 to schedule a free inspection or learn more about our emergency roof repair services.