What Every Delaware Homeowner Should Know Before Replacing a Shingle Roof
How to replace a shingle roof starts with one clear truth: once shingles fail, water can reach the decking, insulation, and interior finishes faster than most homeowners expect. If you’ve noticed curling tabs, missing shingles after a storm, or dark ceiling stains, it is time to act before minor wear turns into structural damage. For trusted guidance from Delaware roofing professionals, this guide explains what to inspect, what materials matter, and when a full replacement is the smarter investment.
Here’s a quick overview of the core steps involved:
- Assess the roof — Identify damage, check shingle age, and decide between repair and full replacement
- Gather tools and materials — Safety harness, roofing shovel, underlayment, drip edge, shingles, nails, flashing
- Remove old shingles — Strip from the peak down, inspect the deck, replace any rotted sheathing
- Install the underlayment and drip edge — Lay felt or synthetic underlayment, add ice and water shield in vulnerable areas
- Install shingles — Start with a starter strip, work up in staggered rows, nail correctly
- Finish the details — Install flashing around chimneys and vents, cap the ridge, seal all edges
- Clean up — Use a magnetic sweeper for nails, dispose of old materials properly
This guide walks through each step in practical detail so you can understand the process, common failure points, and the decisions that affect roof lifespan. A small patch for a few wind-damaged shingles is very different from a full tear-off on an aging roof. Scope, safety, ventilation, and deck condition all matter.
If you need expert help, First State Roofing & Exteriors gives free estimates and free inspections. Call (302) 222-4065 for a free inspection, or learn more about our roof replacement services.
I’m Richard McCain, Owner and President of First State Roofing & Exteriors, with over 20 years of hands-on experience guiding Delaware homeowners through roof replacement projects of every size and complexity. I’ve put together this guide to give you a clear, honest picture of how to replace a shingle roof — from the first inspection to the final cleanup.

How to replace a shingle roof helpful reading:
Assessing the Need: When to Replace a Shingle Roof
A shingle roof should be replaced when widespread deterioration affects waterproofing, fastening strength, or the roof deck beneath it. Before you plan a tear-off, determine whether the problem is isolated damage or system-wide failure. A well-maintained 3-tab shingle roof typically lasts 15 to 20 years, while architectural shingles often last 25 to 30 years when ventilation, flashing, and installation quality are all correct.
In Delaware, roofs face heat, humidity, wind-driven rain, freeze-thaw cycles, and coastal storm exposure. Those conditions can shorten service life, especially on older roofs with marginal attic ventilation or repeated repairs. If a roof is near the end of its expected lifespan and problems are appearing in multiple areas, full replacement is usually more cost-effective than repeated patching. For a deeper look at material longevity, see our Asphalt Roof Replacement Ultimate Guide.

Signs of Roof Failure
These conditions are strong indicators that replacement, not repair, may be the correct move:
- Curling or Cupping: Distorted shingles no longer shed water as designed and are more vulnerable to wind uplift.
- Granule Loss: Excess granules in gutters mean the asphalt surface is losing UV protection and weather resistance.
- Daylight in the Attic: Visible openings through the roof boards signal an active pathway for water and air intrusion.
- Sagging: A sagging roofline often points to deteriorated sheathing, framing, or long-term moisture damage.
- Interior Water Stains: Brown ceiling or wall stains usually indicate that water has moved past the shingles and underlayment.
If you are seeing these warning signs, consult our Roof Replacement Cost Guide 2025 to start budgeting for the project.
DIY vs. Professional Installation
DIY roof replacement can reduce labor cost, but it also increases risk, project time, and the chance of installation errors. Old shingles weigh roughly 200 pounds per 100 square feet for each layer, so even an average-sized roof involves moving several tons of debris and materials.
Professional crews often complete a standard replacement in 1 to 3 days. A DIY project may take 1 to 2 weeks, leaving the home more exposed to changing weather. Just as important, many shingle manufacturers require installation methods that must be documented precisely for full warranty protection. If the roof is steep, complex, or heavily penetrated with vents, chimneys, and valleys, professional installation is usually the safer and more durable choice.
Essential Preparation: Tools, Materials, and Safety
You cannot successfully complete a roof replacement without the right gear. Using the wrong tools not only makes the job harder but can lead to a roof that leaks within months.
Safety Gear and Precautions
Safety is non-negotiable. According to OSHA standards, fall protection is required for heights over six feet.
- Safety Harness: A full-body harness with a rope and roof anchor is essential.
- Soft-Soled Shoes: Wear sneakers with high-grip rubber soles; avoid leather-soled boots which can slip on granules.
- Roof Jacks: These provide stable platforms for you to stand on while working on steep pitches.
- Weather Monitoring: Never work on a wet roof. Even a light morning dew can make shingles as slippery as ice.
Proper preparation also helps prevent ice dams by ensuring you have the right barriers in place before the shingles go down.
Material Selection
When choosing materials, consider the local climate. Asphalt shingle replacement typically involves two choices: 3-tab or architectural shingles. We highly recommend architectural shingles for Delaware homes because they are often rated to withstand winds up to 110 mph or more.
Materials Checklist:
- Shingles: Buy 10-15% more than your square footage to account for waste.
- Underlayment: 30-pound felt or modern synthetic underlayment.
- Drip Edge: Galvanized steel or aluminum to guide water away from the fascia.
- Ice and Water Shield: A self-adhering membrane for valleys and eaves.
- Fasteners: 1.25-inch galvanized roofing nails.
- Roofing Cement: For sealing flashing and high-wind areas.
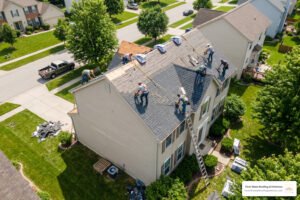
Step-by-Step Guide: How to Replace a Shingle Roof
Now we get to the heart of the project. This process requires a systematic approach to ensure your home remains dry throughout the transition.
Preparing the Deck for How to Replace a Shingle Roof
The “tear-off” is the messiest part of the job. Use a roofing shovel to pry up shingles starting at the ridge and working down toward the eaves. Once the old material is removed—and properly disposed of in a dumpster—you must inspect the wooden deck (sheathing).
Look for soft spots, mold, or rot. Any damaged plywood must be replaced to provide a solid nailing surface. Once the deck is sound, install the drip edge along the eaves. Follow this with your ice and water shield in the valleys and then the underlayment over the rest of the roof. For more details on this stage, see our Roof Installation Complete Guide.
Installing the Shingle Courses
The secret to a professional-looking roof is alignment.
- Starter Strip: Install a starter course along the eaves. This is a shingle with the tabs cut off (or a specialized starter product) that provides an adhesive bond for the first row.
- Chalk Lines: Snap horizontal chalk lines every 5 inches and vertical lines every 6 inches to keep your rows straight.
- Nailing Pattern: Use a four-nail pattern (six in high-wind areas). Nails should be driven straight and flush, about 1 inch above the shingle cutouts.
- Staggering: Offset the seams of each row so that the vertical gaps do not align. This prevents water from finding a direct path to the underlayment.
Our Roofing Installation Complete Guide provides further visual aids for these patterns.
Final Details for How to Replace a Shingle Roof
The “penetrations”—chimneys, vents, and valleys—are where 90% of leaks occur. Install new flashing around these areas, using roofing mastic to ensure a watertight seal. Finally, install ridge cap shingles over the peak of the roof. These are specifically designed to bend over the ridge and provide the final seal. If you’re curious about the financial breakdown of these finishing touches, see the Average Cost to Tear Off and Replace Roof.
Common Mistakes to Avoid During Installation
Even experienced DIYers can make errors that void warranties or lead to leaks.
- High Nailing: Placing nails too high on the shingle means they don’t catch the layer underneath, leading to shingles blowing off.
- Over-driven Nails: If a pneumatic nailer is set too high, the nail head will cut through the shingle.
- Skipping Underlayment: Never install shingles directly onto wood.
- Poor Ventilation: A roof that can’t “breathe” will cook from the inside out, leading to premature shingle failure.
- Improper Flashing: Reusing old, rusty flashing is a recipe for disaster. Always install new flashing with a new roof.
For more on common pitfalls, How To Repair and Replace Roof Shingles for Your Home – This Old House offers excellent cautionary advice.
Frequently Asked Questions about Shingle Replacement
Can I install new shingles over an existing layer?
While you can do a “lay-over” in some jurisdictions, we generally advise against it. Most building codes limit roofs to two layers. However, an overlay prevents you from inspecting the deck for rot and adds immense weight to your home’s structure. Furthermore, new shingles will not lay flat over old, curled ones, which significantly reduces their lifespan. For a full comparison, read our Roof Replacement Complete Guide.
How long does a DIY roof replacement typically take?
A professional crew in Dover or Milford can finish a standard roof in 1 to 3 days. For a DIYer, expect the project to take 1 to 2 weeks of consistent work. You must have a helper for safety and material handling, and you must have a plan for tarping the roof if rain is forecasted.
What is the best weather for replacing a shingle roof?
The ideal temperature range is between 40 and 85 degrees Fahrenheit. If it’s too cold, shingles become brittle and crack when nailed. If it’s too hot, the asphalt softens, and you may scuff the surface just by walking on it. Summer is popular for the heat-activated adhesive strips to bond, but late spring and early fall are often the most comfortable for the workers. Learn more in The Ultimate Guide to Residential Roof Replacement Materials Timing and More.
Conclusion
Knowing how to replace a shingle roof means understanding more than shingle layout. A lasting roof depends on sound decking, proper underlayment, accurate nail placement, new flashing, and balanced ventilation. When those components work together, the roof sheds water efficiently and protects the home for decades.
At First State Roofing & Exteriors, we help Delaware homeowners make informed decisions with clear recommendations, professional installation, and reliable service. Whether you need a full replacement or an expert opinion on whether repairs are still worthwhile, our team is here to help.
**Need a professional assessment for your Delaware home? First State Roofing & Exteriors gives free estimates and free inspections. Call (302) 222-4065 for a free inspection or schedule your free inspection today to get started.**