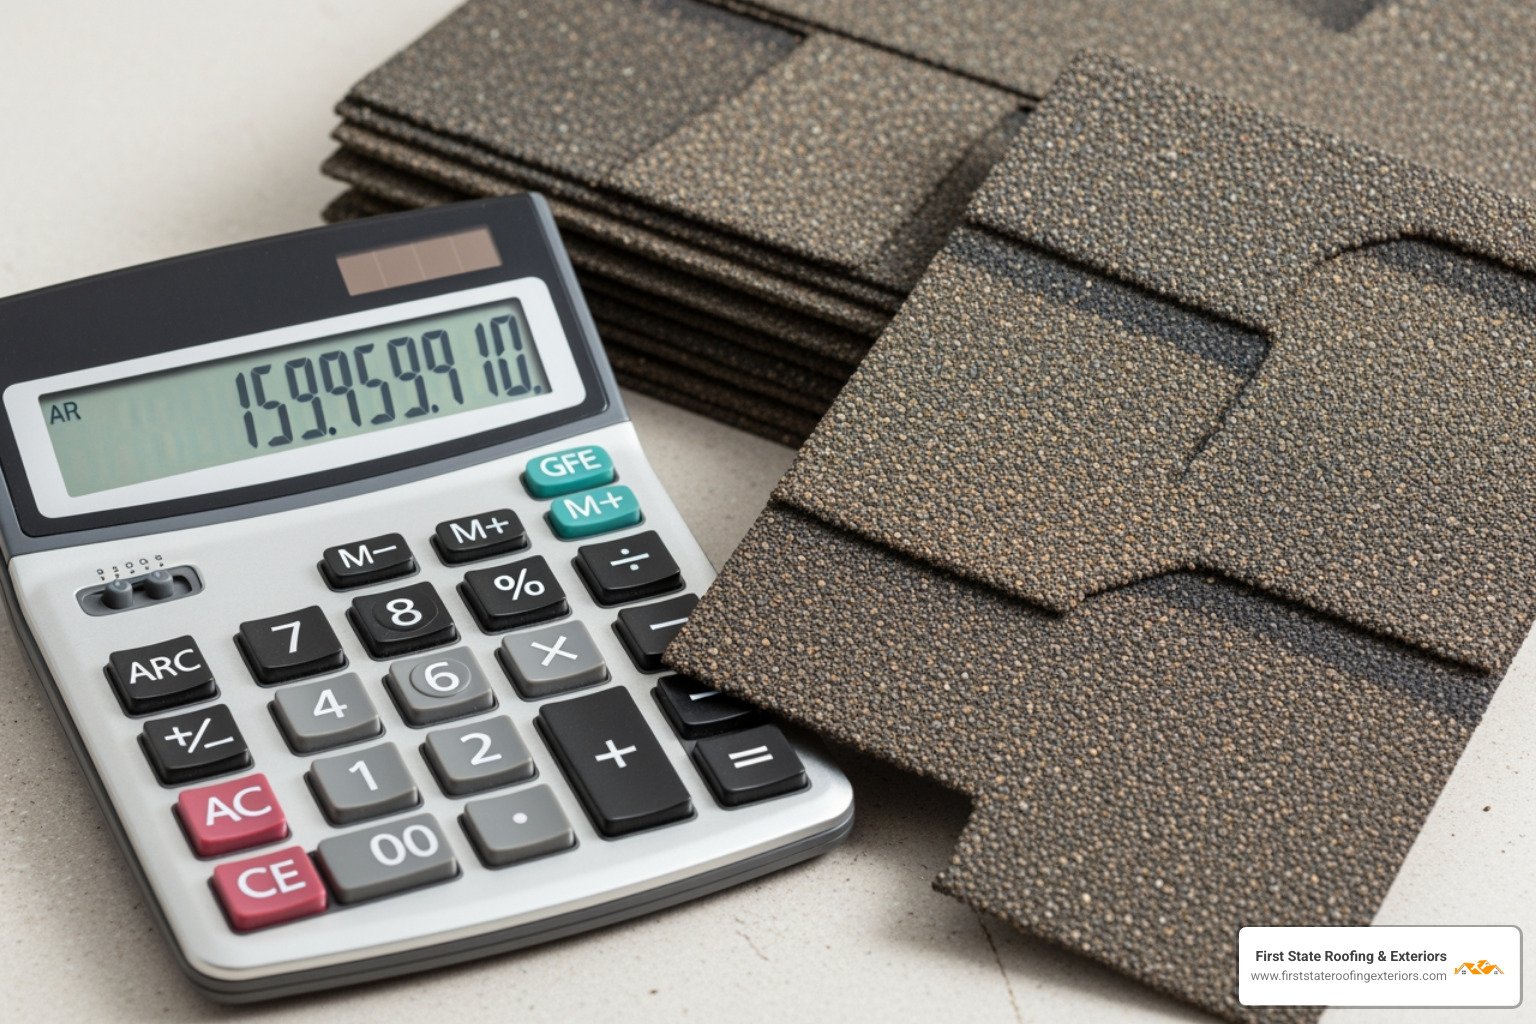
Why Accurate Material Estimation Saves You Money and Time
A shingle calculator is an online tool that helps homeowners and contractors estimate the quantity of roofing materials needed for a project by inputting basic roof dimensions and pitch. Whether you’re planning a roof replacement or budgeting for repairs, getting your material estimate right is a critical first step in any project handled by expert roofing services. An accurate estimate helps you avoid costly mistakes and project delays.
Quick answer: How to use a shingle calculator:
- Measure your roof – Length and width of each section, plus overhangs
- Enter roof pitch – The steepness of your roof (rise over run, like 6:12)
- Calculate squares – The tool converts your measurements to roofing squares (100 sq ft each)
- Review bundle count – Most calculators show how many shingle bundles you need (typically 3 per square)
- Add 10-15% waste – Extra material for cuts, mistakes, and future repairs
According to industry data, a standard bundle of asphalt shingles covers approximately 33.3 square feet, meaning three bundles cover one roofing square. For example, a 2,240 square foot roof requires roughly 67 bundles of shingles. The average cost of materials for standard 3-tab shingles runs about $100 per square, including underlayment and nails.
Why this matters: Underestimating materials means project delays and extra delivery fees. Overestimating wastes money on unused supplies. A proper shingle calculator helps you order the right amount the first time.
Most online calculators account for roof pitch automatically by applying slope correction factors—a roof with a 6:12 pitch has a multiplier of 1.12, meaning the actual surface area is 12% larger than the footprint. This adjustment is essential because steeper roofs require more material to cover the same horizontal area.
Beyond just shingles, complete roofing projects require underlayment (typically 400-432 sq ft per roll for #30 felt), roofing nails (320-480 per square depending on shingle type), and accessories like drip edge, flashing, and ridge caps.
I’m Richard McCain, owner of First State Roofing & Exteriors, and over my 20+ years in the Delaware roofing industry, I’ve seen countless homeowners struggle with material estimates—which is why I always recommend using a reliable shingle calculator as your first planning step. Throughout this guide, I’ll walk you through exactly how to use these tools effectively and when you should trust the calculator versus calling in professional expertise.

Explore Related Topics:
How to Use a Shingle Calculator: A Step-by-Step Guide
A shingle calculator is a digital estimation tool designed to simplify the complex process of figuring out how many shingles and other materials you’ll need for your roofing project. It’s essentially a smart assistant that takes your roof’s measurements and, with a bit of mathematical magic (often using the Pythagorean theorem for rafter lengths), provides instant results. These tools can handle automatic conversions between different units and often output roof pitch in various formats like degrees, percentage, and the familiar x:12 ratio. This makes planning your roofing project much easier and helps us avoid those head-scratching moments on the job site.

For a general idea, you can explore tools like the Roofing Calculator.
What Information Do I Need for a Shingle Calculator?
To get accurate results from a shingle calculator, you’ll need to gather a few key pieces of information about your roof. Think of it as feeding the calculator the right ingredients for a perfect recipe.
Here’s what you’ll typically need:
- Roof Dimensions: This includes the length and width of your house’s base. For a straightforward gable roof, you’ll measure the length of the roof at the base (eave/gutter side) and the width of the roof at the base (gable side). For hip roofs, either side can serve as your length or width.
- Overhangs: Don’t forget those eaves and rakes! You’ll need to account for the width of any roof overhangs. A good rule of thumb is to multiply the overhang width by two and add that to your respective side measurements to get the true footprint.
- Roof Sections: If your roof isn’t a simple rectangle or square, you’ll need to break it down into its individual sections. Measure each distinct area (e.g., separate sections for a cross-gable or dormers) to ensure comprehensive coverage.
- Roof Type: Some calculators ask you to specify your roof type (e.g., gable, hip, mansard). This helps them apply appropriate waste factors and calculation methods.
- Roof Pitch: This is crucial and often overlooked. The pitch (or steepness) of your roof significantly impacts the actual surface area that needs to be covered. We’ll dive deeper into this next.
The good news is that most shingle calculators are designed with user-friendliness in mind, so inputting these simple details is usually a breeze.
How a Shingle Calculator Accounts for Roof Pitch
Roof pitch is the measurement of a roof’s vertical rise divided by its horizontal run. In the US, it’s commonly expressed as a ratio of rise over 12 inches of run (e.g., a 7/12 pitch means the roof rises 7 inches for every 12 horizontal inches). This seemingly small detail plays a huge role in how much material you’ll need.
Here’s why: a flat-looking roof and a steep roof might cover the same “footprint” on the ground, but the steeper roof has a much larger actual surface area. Imagine covering a flat sheet of paper versus a folded piece of paper – the folded one takes up more surface area, even if its base is the same.
Shingle calculators account for this by using a pitch multiplier or slope correction factor. This factor converts the horizontal footprint area into the true surface area of your roof. For instance, a roof with a 4/12 pitch that measures 100 square feet horizontally will have an actual surface area of 105.4 square feet once the multiplier is applied. This means you’ll need 5.4% more material than if you just measured the flat footprint.
The steeper the pitch, the larger the multiplier, and thus, the more material required. For example:
- 3:12 pitch has a multiplier of 1.035
- 6:12 pitch has a multiplier of 1.12
- 12:12 pitch has a multiplier of 1.414
These adjustments are critical for accurate estimates, preventing you from running short on shingles halfway through your project or ending up with a mountain of unused bundles. Steeper roof pitches are also common in areas like Delaware, where we experience heavy rain or snowfall, as they improve drainage.
How to Manually Calculate Shingles for Your Roof
Even with the convenience of a shingle calculator, understanding the manual calculation process is empowering. It helps you double-check estimates, troubleshoot discrepancies, and gain a deeper appreciation for the work involved. Just remember to prioritize safety if you’re measuring your roof yourself. Always use appropriate safety gear, like an OSHA-required safety harness, and consider leaving the high-up measurements to the pros.
This method involves breaking your roof into manageable sections, applying basic geometry, and a bit of pen-and-paper work. For more general advice on maintaining your roof, check out our Roofing Tips.
Step 1: Measuring Your Roof’s Total Square Footage
The first step to any accurate estimate is precise measurement. While it’s always safest to measure from the ground using tools like a measuring wheel or by projecting rooflines, for the most accurate results, a professional will safely access the roof.
Here’s how to approach it:
- Measure Each Roof Plane: Your roof isn’t usually one giant rectangle. It’s typically made up of several planes. Measure the length and width of each rectangular section.
- Area of a Rectangle: Length x Width = Square Footage.
- Account for Gables: Gables are the triangular sections of your roof.
- Area of a Triangle: (Base x Height) / 2 = Square Footage.
- Sum All Sections: Once you have the square footage for every plane and gable, add them all together. This gives you the total horizontal square footage of your roof’s footprint.
This is just the horizontal footprint. We’ll adjust for pitch in the next step if you’re not using a calculator that does it automatically. For complex roof shapes, such as those with dormers, valleys, or hips, you’ll need to measure each individual section and sum them up for greater accuracy.
Step 2: Converting Square Feet to “Squares” and Bundles
In the roofing world, we don’t often talk about thousands of square feet when ordering materials. Instead, we use a unit called a “square.”
What is a roofing ‘square’?
A roofing ‘square’ is an imperial unit of area equal to 100 square feet. This unit simplifies material ordering and pricing, as roofing contractors typically quote projects and purchase materials in squares. It’s a standard unit used across various construction calculations, including roofing, siding, and even drywall.
Why is it used?
It standardizes quantities, making it easier for manufacturers, suppliers, and contractors to communicate and manage large volumes of material.
How many shingles are in a bundle?
The typical coverage area of a bundle of shingles is approximately 33.3 square feet. This means that, on average, you’ll need three bundles of shingles to cover one roofing square (100 sq. ft. / 33.3 sq. ft. per bundle ≈ 3 bundles). While a standard bundle usually contains 29 standard (12″ x 36″) shingles, this can sometimes vary by manufacturer, so always double-check the specific coverage on the packaging.
To convert your total square footage to squares and then to bundles:
- Calculate Total Squares Needed: Take your roof’s total adjusted square footage (after accounting for pitch, if doing it manually) and divide it by 100. Always round up to the nearest whole number. For example, if your roof is 1,550 square feet, that’s 15.5 squares, which you’d round up to 16 squares.
- Calculate Total Bundles: Multiply the total number of squares by 3 (since 3 bundles typically cover 1 square). So, for 16 squares, you’d need 16 x 3 = 48 bundles.
This conversion is a fundamental step in accurately estimating your shingle needs.
Step 3: Factoring in Overage for an Accurate Order
“Measure twice, cut once,” the old saying goes, but even with the best measurements, roofing projects inevitably produce some waste. This is where factoring in “overage” becomes crucial.
What is overage or waste?
Overage is the extra material you order beyond your calculated net needs to account for various factors:
- Cuts for Hips and Valleys: These complex roof features require shingles to be cut at angles, leading to unusable scraps. Hip roofs, for instance, typically generate more waste (around 15%) than simpler gable roofs (around 7.5%).
- Starter Course Waste: The first course of shingles laid at the eaves often requires specific cuts or starter strips, leading to some material not being fully used.
- Damaged Shingles: Sometimes shingles arrive damaged or get damaged during installation. It’s better to have a few spares than to halt the project for a single bundle.
- Mistakes: Let’s face it, even the most seasoned roofers can make a cutting error.
- Future Repairs: Having a few extra bundles on hand can save you a lot of hassle if you ever need to replace a few shingles after a storm.
How much overage should you account for?
We generally recommend accounting for 5-10% overage on your project. For more complex roofs with many hips, valleys, or dormers, bumping this up to 15% is a wise decision. This ensures you have enough material if measurements are slightly off, or if there’s unexpected waste or damage. For example, if your calculation suggests 50 bundles, ordering 53-55 bundles (a 6-10% overage) would be prudent.
This seemingly small buffer can save you significant time and money by avoiding delays and rush delivery fees for just a few extra bundles. It’s a small investment for peace of mind. To learn more about how we handle installation, refer to our Roof Installation Complete Guide.
Beyond Shingles: Estimating All Essential Roofing Materials
While shingles are the star of the show, a complete, watertight, and durable roofing system requires a supporting cast of other essential materials. Ignoring these components in your estimate is like forgetting the foundation for a house – it just won’t stand up. These materials work together to protect your home from the elements and ensure the longevity of your roof.

Essential Roofing System Components
Here’s a breakdown of the other crucial materials you’ll need to consider, along with how to estimate their quantities:
- Underlayment (Felt vs. Synthetic): This is the protective layer installed directly on the roof deck before shingles.
- Felt Paper: Traditional 15-pound felt covers about 400 sq. ft. per roll (4 squares), while heavier 30-pound felt covers about 200 sq. ft. (2 squares) or sometimes 432 sq. ft. per roll. We often recommend 30-pound felt for steeper slopes.
- Synthetic Underlayment: These newer materials are thinner, lighter, and offer superior performance. Their coverage varies by manufacturer, so check the product specifications.
- Quantity: You’ll need enough underlayment to cover the entire roof area, plus an additional 10% for overlaps and waste.
- Ice & Water Shield: A self-adhering membrane that provides extra protection in vulnerable areas like eaves, valleys, and around chimneys. This is particularly important in colder climates or areas prone to ice dams.
- Quantity: Typically installed along the eaves (often 3-6 feet up from the edge) and in valleys. Measure the linear feet of these areas.
- Drip edge: Metal flashing installed along the edges of the roof to direct water away from the fascia and into the gutters, protecting the roof deck and preventing water damage.
- Quantity: Measure the total linear feet of all eaves and rakes.
- Starter Shingles: A crucial first course of shingles installed along the eaves to provide a clean edge, reinforce against wind uplift, and prevent water infiltration at the bottom edge of the roof.
- Quantity: Measure the total linear feet of all eaves.
- Ridge Cap Shingles: Specialized shingles used to cover the peak (ridge) and hips of the roof, providing a watertight seal and a finished appearance.
- Quantity: Measure the total linear feet of all ridges and hips.
- Roofing Nails: Essential for securing shingles and other components.
- Quantity: A standard 3-tab shingle typically requires four nails per shingle, totaling around 320 nails per square. Architectural shingles might require 480 nails per square. In high-wind areas, more nails per shingle may be required.
- Flashing and Sealant: Metal flashing is used around penetrations like chimneys, skylights, and vents to prevent leaks. Sealants (roofing cement, caulk) are used to seal small gaps and reinforce flashing.
- Quantity: Estimate based on the number and size of penetrations and linear feet of seams needing sealing. Always buy extra tubes of sealant.
By accounting for these materials, you ensure a comprehensive and accurate estimate for your complete roofing system.
Understanding Shingle Types and Total Project Costs
Choosing the right shingle type is more than just an aesthetic decision; it profoundly impacts your budget, the longevity of your roof, and your home’s overall value. Different materials offer varying levels of durability, energy efficiency, and curb appeal.
Comparing Common Roofing Shingles: Pros and Cons
Here’s a quick comparison of the most common roofing shingles we work with in Delaware:
| Shingle Type | Lifespan | Cost (per bundle/square) | Durability | Aesthetics | Weight (per bundle) |
|---|---|---|---|---|---|
| Asphalt 3-Tab | 15-25 years | $25-$35 per bundle ($75-$100/sq) | Basic weather protection, prone to wind lift | Flat, uniform look | ~75 lbs |
| Architectural Asphalt | 25-30+ years | $30-$50 per bundle ($90-$150/sq) | Excellent wind & hail resistance, thicker, layered | Dimensional, mimics wood/slate, varied colors | ~75-100+ lbs |
| Wood Shake | 20-30 years | Higher | Eco-friendly, vulnerable to fire/termites | Rustic, natural look | Moderate |
| Metal | 40-70+ years | Significantly Higher | Durable, lightweight, energy-efficient | Modern, sleek, can be noisy in rain | Lighter |
| Slate | 50-100+ years | Very High | Non-combustible, extremely long-lasting, heavy | Neat, classic, very heavy | Very heavy |
Note: Costs are approximate and can vary based on brand, quality, and market fluctuations in Delaware.
While asphalt shingles remain a popular choice due to their balance of cost and performance, architectural shingles are thicker, layered, and offer improved durability against wind (often rated for 110 mph or more) and hail, lasting 25-30 years with proper installation. For a detailed breakdown of costs, refer to our Roof Replacement Cost Guide 2025.
What Factors Influence Your Final Roofing Cost?
Estimating the cost of shingles is just one piece of the puzzle. The final cost of your roofing project in Delaware is influenced by a multitude of factors beyond the materials themselves. Understanding these will help you budget more effectively and avoid surprises.
Here are the key factors that influence your final roofing cost:
- Material Quality and Type: As seen above, the choice between standard 3-tab asphalt, architectural shingles, or premium options like metal or slate dramatically impacts the material cost. High-quality architectural shingles, for example, can range from $125 to $160 per roofing square.
- Labor Rates: Labor typically makes up a significant portion, often 50% to 60%, of the total roofing project cost. Rates vary based on local demand, contractor experience, and the complexity of the job.
- Roof Complexity: Simple gable roofs are less expensive to install than complex roofs with multiple valleys, hips, dormers, or skylights. These features require more intricate cutting, flashing, and sealing, increasing both material waste and labor time.
- Number of Layers to Tear Off: If your old roof has multiple layers of shingles, removing them (a “tear-off”) adds to labor and disposal costs. Each additional layer means more work and more debris.
- Roof Deck Condition: Older homes in Delaware, especially in areas like Dover or Smyrna, often have damaged or rotting sheathing beneath the old shingles. If the roof deck needs repairs or replacement, this will add to the cost ($75–$150 per section).
- Permit Fees: Local building codes in Delaware require permits for most roof replacements to ensure the work meets safety standards. These fees vary by municipality.
- Dumpster Rental and Disposal: Removing old roofing materials requires a dumpster, and disposal fees are part of the overall cost.
- Additional Components: Costs for drip edge, underlayment, ice & water shield, flashing, vents, and sealant are all part of the material budget.
- Accessibility: If your roof is difficult to access, or if there are landscaping elements that need protection, this can increase labor time and costs.
- Common Extras:
- Skylight Replacement: If you have skylights, replacing or re-flashing them during a roof job can cost $700–$2,000.
- Gutter Work: Often, homeowners choose to replace or repair gutters during a roof replacement.
- Chimney Flashing & Repairs: Essential for preventing leaks around chimneys, costing $300–$600.
For a comprehensive understanding, our Average Cost to Tear Off and Replace Roof guide provides more insights.
Shingle Calculator vs. Professional Estimate: Which Do You Need?
A shingle calculator is a fantastic tool for preliminary planning and budgeting, but it’s important to know its limitations. Think of it as a helpful guide, not the final word. For precise and professional estimates, especially for something as critical as your home’s roof, you’ll eventually need the expertise of a professional.
How to Verify Your Shingle Calculator’s Accuracy
While online calculators are convenient, they are for general informational purposes only. You can take steps to verify their results:
- Double-Checking Measurements: The accuracy of any calculator relies heavily on the accuracy of your inputs. Double-check all your roof dimensions and pitch measurements.
- Comparing Multiple Calculators: Try using two or three different online shingle calculators and compare their results. If they’re all in the same ballpark, you’re likely on the right track.
- Cross-Referencing with Manual Calculations: If you’ve gone through the manual calculation steps, compare those figures with the calculator’s output. This is an excellent way to catch any major discrepancies.
- Checking Bundle Coverage Specs: Always confirm the specific square footage coverage per bundle for the exact shingles you plan to use, as this can vary slightly by manufacturer and product line.
A calculator can’t see the condition of your existing roof deck or account for unforeseen complexities.
When to Trust a Calculator vs. When to Call a Pro
Knowing when to rely on a calculator and when to bring in the cavalry is key to a smooth roofing project.
Use a shingle calculator for:
- Budgeting: Get a rough idea of material costs to help set your initial project budget.
- Preliminary Planning: Understand the scope of materials needed for your project.
- Simple DIY Projects: For very small, straightforward repairs where you’re just replacing a few bundles.
- Verifying Quotes: If you receive a quote from a contractor, a calculator can help you understand if the material quantities seem reasonable.
Call a professional for:
- Complex Roofs: If your roof has multiple valleys, hips, dormers, skylights, or a very steep pitch, a professional roofer can accurately measure and account for these complexities.
- Before Ordering Materials: Never place a large material order based solely on a calculator. A professional will provide a precise material list, often leveraging specialized software and experience.
- Official Binding Quotes: Only a licensed contractor can give you a binding quote that includes labor, disposal, and all other project costs.
- Ensuring Code Compliance: Local building codes (especially in Delaware) have specific requirements for roofing materials and installation. A professional ensures your new roof meets all regulations.
- Warranty Validation: Many shingle manufacturers require installation by certified contractors to validate their product warranties.
For any significant project, such as a full professional roof replacement, a professional estimate is indispensable. Our Hiring a Roofer Guide offers more advice on selecting the right expert.
Your Next Step: From Estimate to Installation
A shingle calculator is a powerful planning tool, offering a valuable starting point for understanding your roofing material needs. It empowers you with knowledge, helping you visualize the scope and potential costs of your project. However, for the crucial transition from planning to execution, professional consultation ensures accuracy and peace of mind.
At First State Roofing & Exteriors, we understand the nuances of Delaware’s roofing needs. We pride ourselves on providing transparent and detailed assessments, ensuring your project is planned perfectly from the start. For a precise and professional assessment of your roofing needs in Dover, Smyrna, or anywhere in Delaware, it’s always best to get an expert eye. We offer free estimates to eliminate guesswork and ensure you get the right materials and installation for your home.
Don’t let the complexities of roofing estimates overwhelm you. Call us today at (302) 222-4065 for a free inspection or learn more about our roof replacement services. We’re here to help you protect and improve your home with integrity and expertise.