Why Proper Flashing Protects Your Home’s Most Vulnerable Points
Roof flashing repair is one of the most critical maintenance tasks that can save Delaware homeowners thousands in water damage costs. According to industry research, 90 percent of roof leaks happen at flashing points, making these thin metal strips one of the most important—yet often overlooked—parts of your home’s complete roofing system.
Quick Answer for Roof Flashing Repair:
- Identify the problem: Look for water stains, rust, loose sections, or damaged sealant
- Gather tools: Pry bar, roofing cement, replacement flashing, safety gear
- Basic repair steps: Remove damaged flashing, clean area, install new flashing, seal edges
- When to call pros: Extensive damage, steep roofs, or lack of experience
- Cost range: $200-$600 for minor repairs, $1,000+ for major work
That mysterious water stain on your ceiling isn’t just cosmetic—it’s your roof sending an SOS signal. While homeowners often blame shingles for leaks, the real culprit is usually compromised flashing around chimneys, vents, and roof edges.
The stakes are high. Improperly maintained roof flashing is a top contributor to leaks, according to the National Roofing Contractors Association. What starts as a small gap can quickly escalate into rotted decking, damaged insulation, and costly interior repairs.
For Delaware homeowners dealing with coastal weather and seasonal temperature swings, understanding flashing repair isn’t optional—it’s essential protection for your investment. Whether you’re considering a DIY approach or need professional help, this guide will help you make informed decisions about your home’s most vulnerable points.
I’m Richard McCain, owner of First State Roofing & Exteriors, with over 20 years of hands-on experience in roof flashing repair and exterior solutions across Delaware. I’ve seen how proper flashing maintenance can prevent thousands in water damage—and how neglecting these critical components can lead to devastating leaks.
What is Roof Flashing and Why is it Critical?
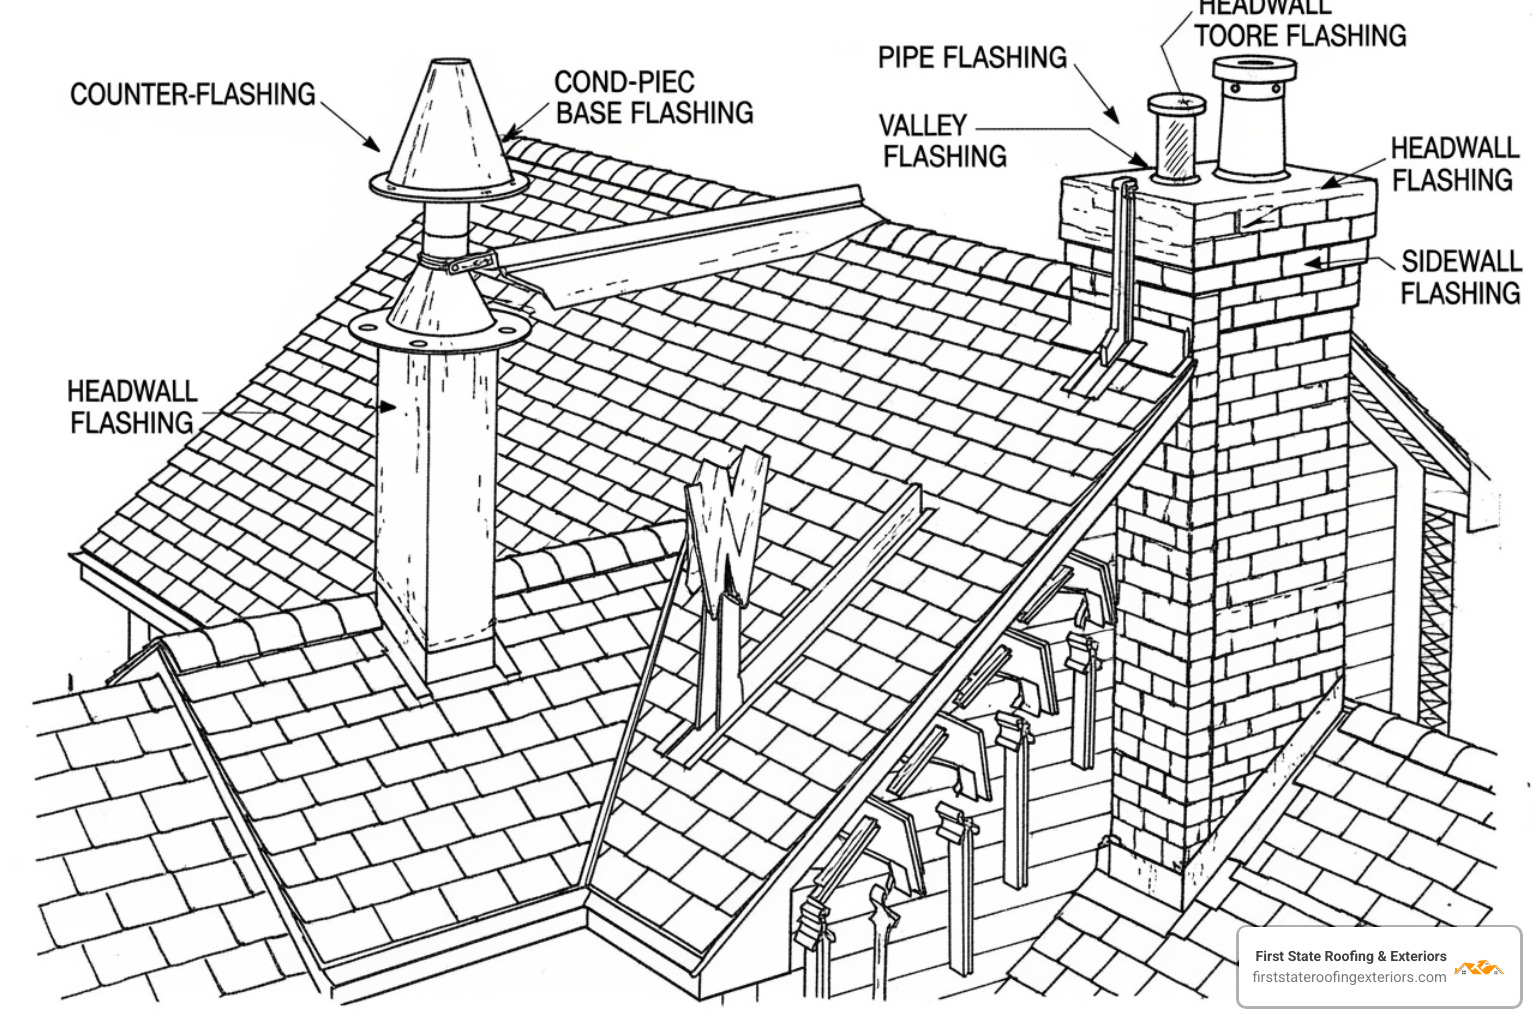
Roof flashing is a vital component of any roofing system, serving as a protective barrier against water penetration in vulnerable areas where different sections of the roof meet or where the roof is penetrated. Think of it as a waterproof sealant for your roof’s seams and joints, preventing water from seeping into the roof’s underlayers and your home.
The Unsung Hero: Water Diversion and Structural Integrity
Why is flashing so important? Because without it, water would simply run straight into your attic and walls. Flashing works by diverting water away from these vulnerable points, directing it down the roof and into your gutters. This prevents leaks, protects the roof’s underlayers from damage, and ultimately safeguards the structural integrity and longevity of your entire home. As we mentioned, improperly maintained flashing is a top cause of leaks, so its role in preventing costly water damage cannot be overstated.
Types of Roof Flashing
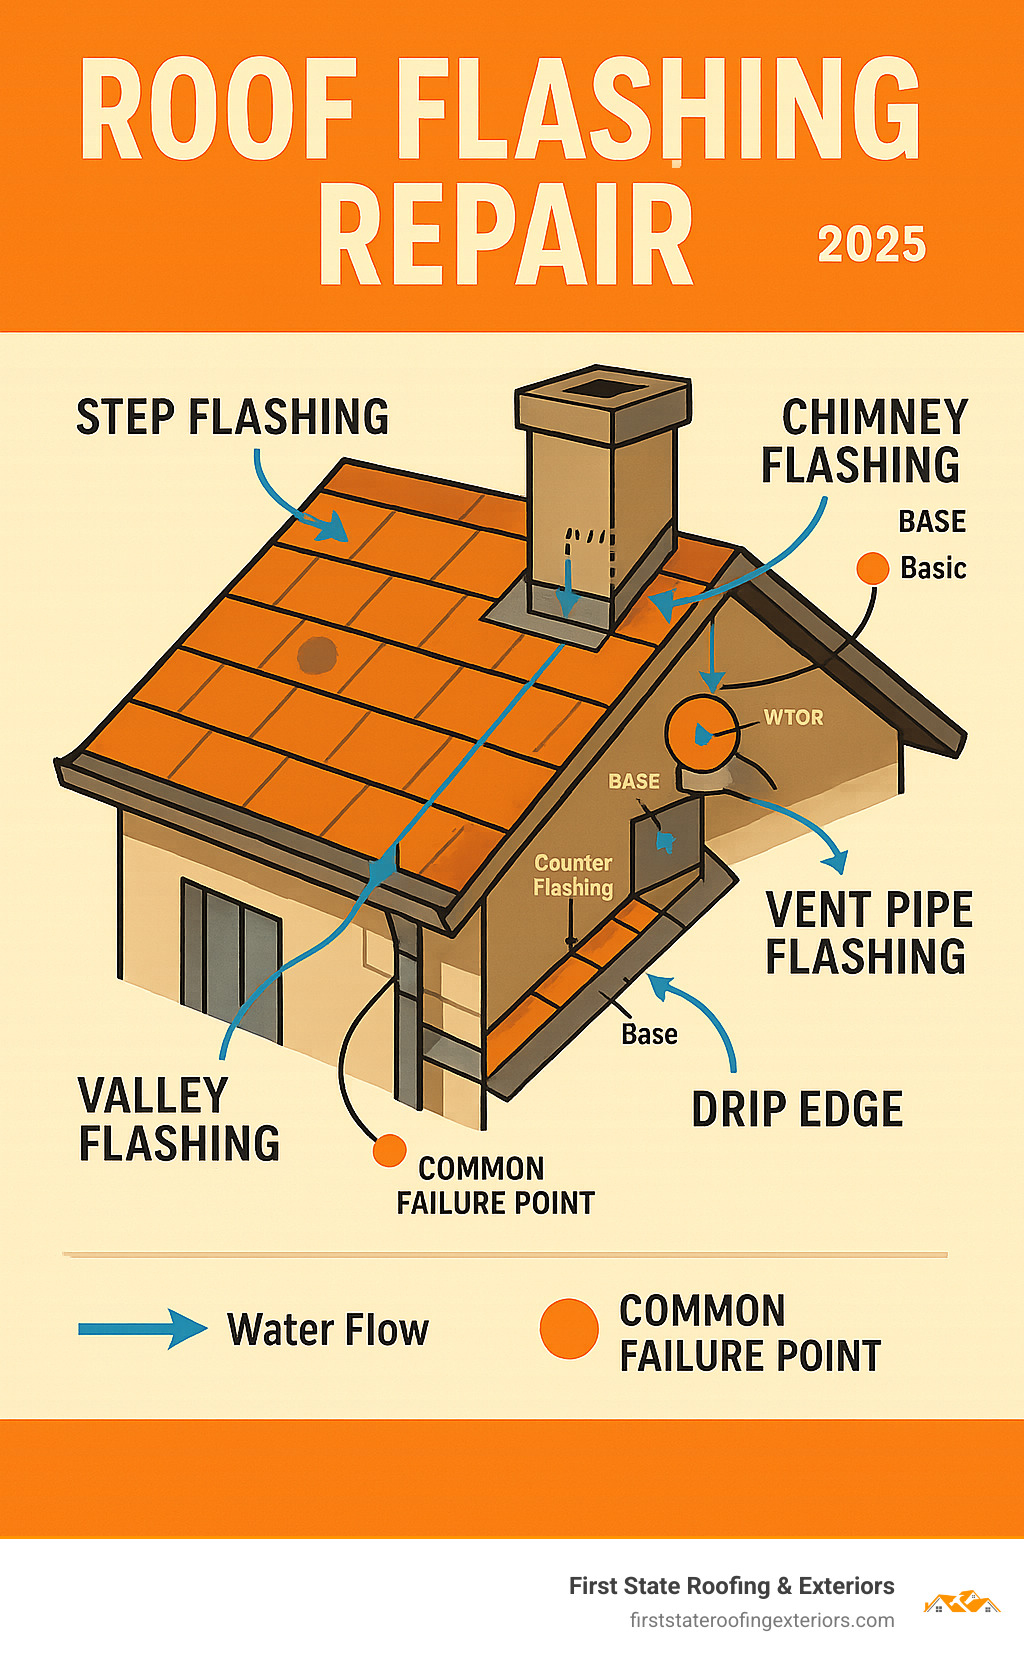
Flashing comes in various shapes and sizes, each designed for a specific purpose and location on your roof:
- Step Flashing: These are individual, rectangular pieces bent at a 90-degree angle, interwoven with shingles along sidewalls or chimneys. Each piece overlaps the one below it, creating a stair-step effect that prevents water from running behind the siding or chimney.
- Valley Flashing: Used where two roof planes meet to form a “valley.” This usually involves a long, continuous piece of metal that channels water efficiently down the roof.
- Vent Pipe Flashing (Pipe Boot): A cone-shaped piece of flashing, often with a rubber collar, that fits snugly around a vent pipe protruding through the roof, creating a watertight seal.
- Chimney Flashing: A complex system, typically involving both base flashing (at the chimney’s base) and counter flashing (mortared into the chimney bricks, covering the base flashing) to allow for movement while maintaining a seal.
- Drip Edge: Installed along the eaves and rake edges of the roof, it helps direct water into the gutters and protects the fascia board from moisture.
- Continuous Flashing: Used in long, straight runs, such as where a roof meets a long wall.
- Kick-Out Flashing: A specialized piece installed at the bottom of a step flashing run, where a roof meets a wall. It diverts water away from the wall and into the gutter, preventing water from running down the siding.
Common materials for flashing include:
- Aluminum: Lightweight, corrosion-resistant, and relatively inexpensive. It’s easy to bend and shape.
- Galvanized Steel: Steel coated with zinc for rust resistance. It’s durable and a common choice.
- Copper: Highly durable, long-lasting, and aesthetically pleasing as it ages to a patina. It’s more expensive but excellent for soldering.
- Lead: Very flexible and durable, often used in complex areas like chimney flashing.
- Tin: Historically used, often tin-coated steel (terne). If properly maintained, it can last for decades.
- Stainless Steel: Very durable and corrosion-resistant, but typically more expensive.
- Zinc: A durable and sustainable option that forms a protective patina.
The best materials for flashing are those that can be shaped easily and have the capability to be easily soldered, brazed, or welded. This creates a single, leak-proof seam, which is crucial for long-term durability.
Spotting the Red Flags: Common Signs of Flashing Failure
Your home has a way of whispering before it starts screaming. Those subtle hints of roof flashing repair needs often show up weeks or months before you’re dealing with buckets in your living room. Learning to read these early warning signs can save you from turning a $300 repair into a $3,000 nightmare.
Water stains on ceilings or walls are your home’s most obvious cry for help. These telltale brown or yellow patches, peeling paint, or mysterious damp spots love to appear near chimneys, skylights, and vent pipes. Here’s the tricky part—water is sneaky. It can travel along beams and through insulation, so that stain in your bedroom might actually be from flashing failure above your kitchen.
Visible rust or corrosion on your flashing tells a story of time and weather taking their toll. When that protective coating wears thin, metal flashing becomes vulnerable to Delaware’s coastal moisture and seasonal temperature swings. What starts as a few rust spots can quickly compromise the entire piece’s ability to keep water out.
Take a close look at the sealant around your flashing joints. That caulking or roofing cement isn’t just there for looks—it’s working hard to keep water from sneaking through tiny gaps. When you see cracking, shrinking, or sections pulling away from the metal, it’s time to take action. UV rays and weather cycles are relentless enemies of even the best sealants.
Loose or missing flashing sections often announce themselves after storms. If you find pieces of metal in your yard or notice flashing that’s lifted, bent, or completely gone, don’t wait for the next rain to see what happens. High winds can turn a small loose section into a major breach in your roof’s defenses.
Damaged shingles around flashing areas can signal trouble brewing underneath. When water gets behind flashing, it often undermines nearby shingles, causing them to curl, crack, or slide out of place. It’s like a domino effect—one problem creates another.
During rainy weather, dripping sounds in your attic are never a good sign. If you hear that rhythmic plip-plop coming from above, grab a flashlight and investigate. Often, flashing failure is the culprit behind these unwelcome indoor water features.
Don’t ignore the warning signs your home is giving you. Early detection can prevent extensive water damage and protect your family’s health and safety. A professional roof inspection can pinpoint these issues before they become major problems, giving you the peace of mind that comes with knowing your home is properly protected.
A Homeowner’s Guide to DIY Roof Flashing Repair
Ready to tackle roof flashing repair yourself? For minor issues, DIY repairs can save you money and give you that satisfying “I fixed it myself” feeling. But before you grab your ladder, let’s talk safety and smart decision-making.
Working on a roof isn’t like fixing a leaky faucet—one wrong step can lead to serious injury. That’s why safety always comes first. Use a sturdy ladder that’s tall enough and properly positioned on level ground. Never attempt roof work in wet, icy, or windy conditions. Wait for a clear, dry day when you can focus completely on the task.
Your safety gear arsenal should include non-slip shoes, work gloves, and safety goggles. For steep roofs or high areas, invest in a safety harness anchored to the roof—it’s what we use on every job for good reason. Having a buddy on the ground isn’t just helpful for passing up tools; it’s smart safety planning.
Know Your Limits: When DIY Makes Sense
DIY is perfect for small holes, minor cracks in sealant, slightly loose flashing that just needs re-securing, or routine maintenance tasks. These repairs are straightforward and forgiving if you make small mistakes.
Call First State Roofing & Exteriors for extensive damage, flashing in precarious locations like steep chimneys, or when you lack experience. Here’s the honest truth: botched DIY repairs often cost more to fix than hiring professionals from the start.
One common mistake we see repeatedly? Homeowners relying solely on caulk for roof flashing repair. While caulk offers a quick temporary fix, it’s not a permanent solution. It lacks the durability to withstand constant expansion and contraction of roof materials. For detailed information on why caulk isn’t a permanent solution for roof flashing leaks, this expert resource explains the science behind proper repairs.
Tools and Materials You’ll Need
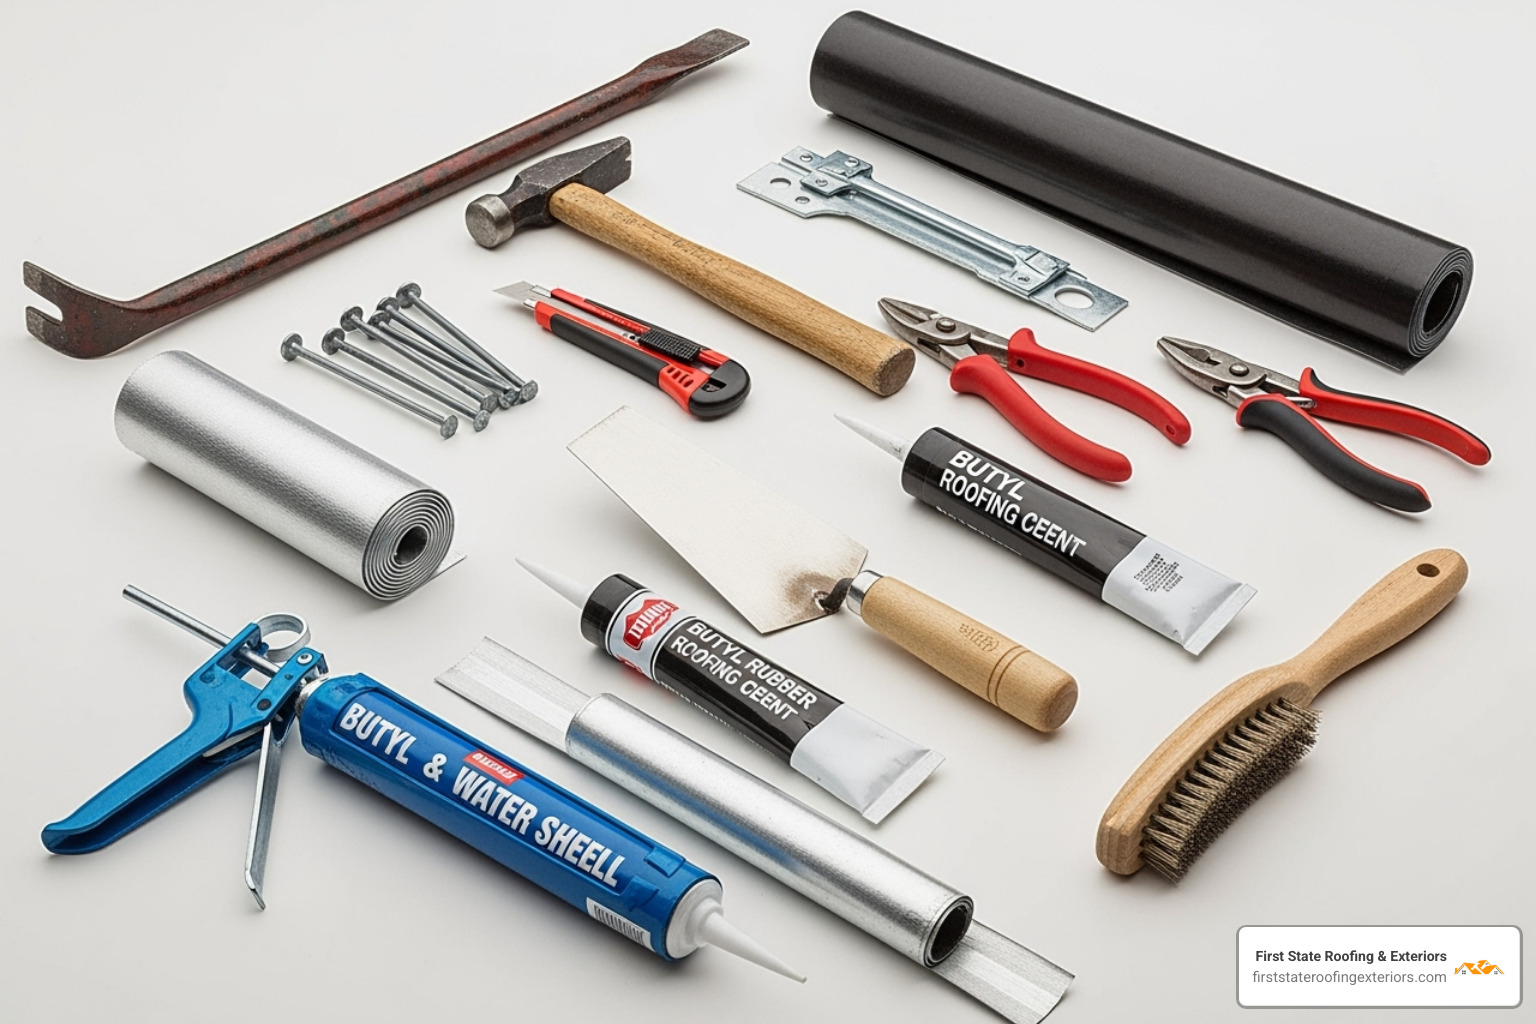
Preparation prevents poor performance. Gather everything before climbing up: a pry bar for removing old flashing and shingles, hammer for roofing nails, galvanized roofing nails for corrosion resistance, and a utility knife for cutting materials.
You’ll also need tin snips for cutting metal flashing, a trowel for applying roofing cement, caulking gun for sealants, roofing cement (plastic asphalt cement), and butyl rubber caulk for sealing around pipes and chimneys.
Don’t forget your replacement flashing—ensure it’s compatible with your existing materials. Ice and water shield adds extra protection, while a wire brush helps clean surfaces properly. Round out your kit with that safety harness, sturdy ladder, gloves, and goggles we discussed.
Step-by-Step Guide to a Basic Roof Flashing Repair
Let’s walk through replacing damaged step flashing—one of the most common repairs homeowners tackle successfully.
Start by carefully removing old shingles covering the damaged flashing. Use your pry bar gently to avoid damaging adjacent shingles. Work slowly and deliberately—rushing leads to more broken materials.
Next, pry up the damaged flashing once shingles are clear. Again, gentle pressure prevents damage to the underlying roof deck. Clean the area thoroughly with your wire brush, removing old sealant, debris, and any rust. The surface must be completely clean and dry for proper adhesion.
For extra protection, especially in Delaware’s variable climate, apply a strip of self-adhering ice and water shield directly to the clean roof deck. This additional barrier is particularly valuable in areas prone to ice dams.
Measure and cut your new flashing to the appropriate size. For step flashing, ensure it’s bent at exactly 90 degrees and sized for proper overlap with shingles. Install the new flashing by sliding it into place, ensuring it extends up the wall and overlaps the shingle below.
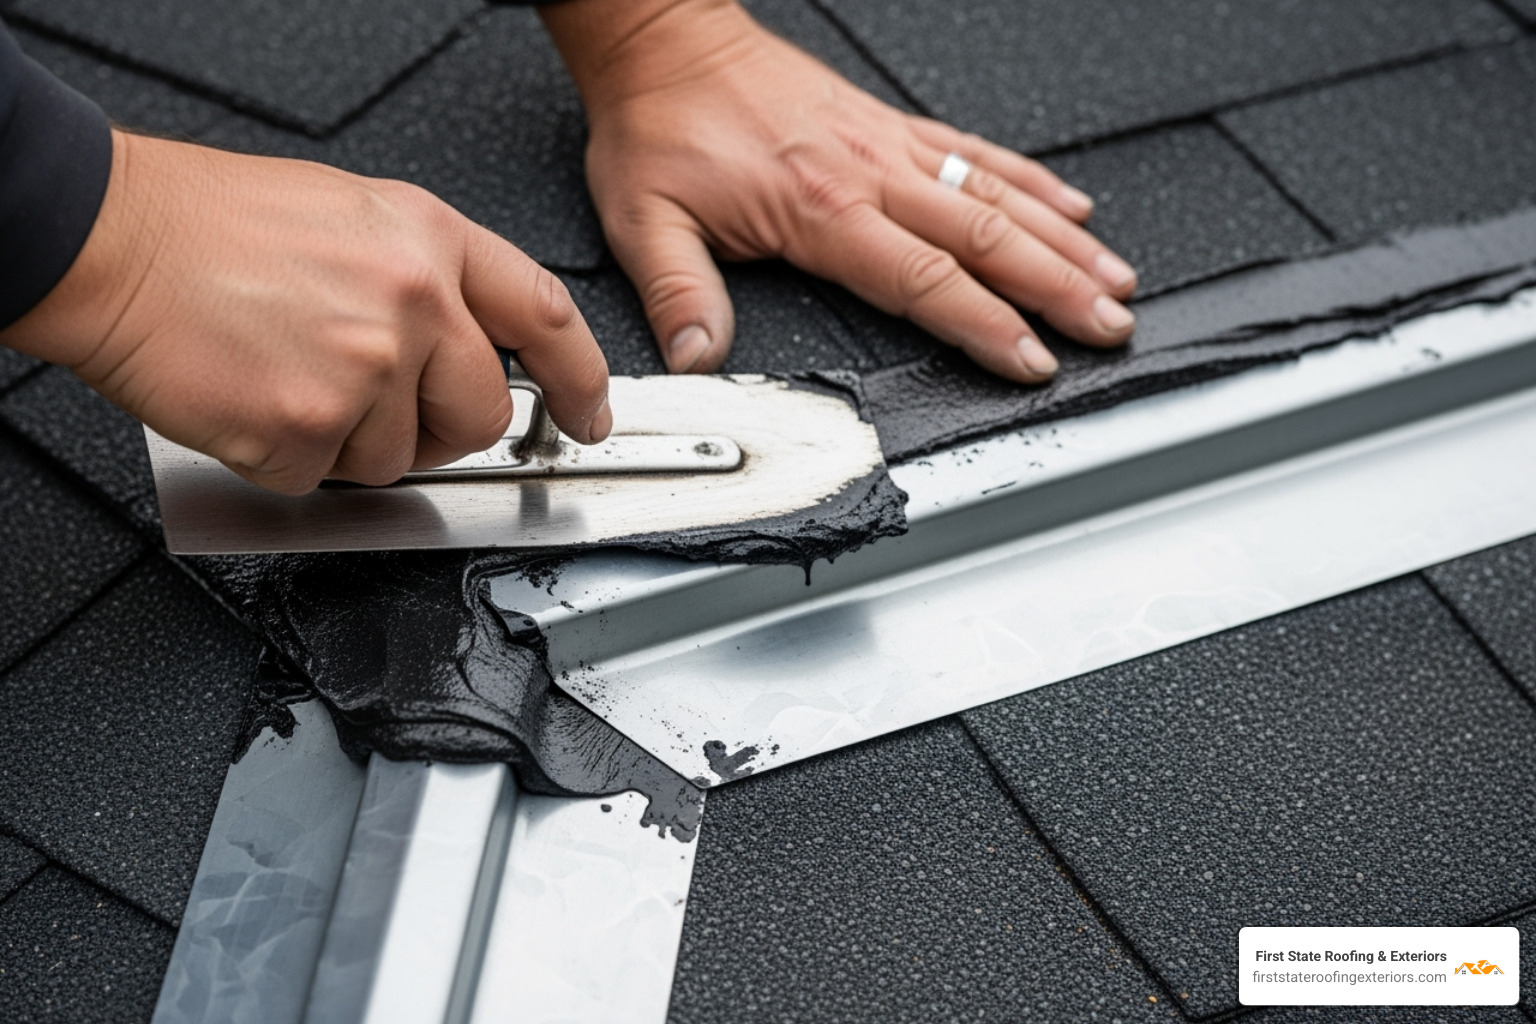
Secure with roofing nails, placing them only where the next shingle layer will cover them. Exposed nail heads are leak magnets. Apply roofing cement generously along all flashing edges, especially where it meets the roof deck and overlapping seams. Use your trowel for complete coverage and watertight sealing.
Reinstall the shingles carefully, ensuring proper alignment and overlap. Finally, seal any exposed nail heads with small dabs of roofing cement for complete waterproofing.
How to Repair Flashing Around Vents and Chimneys
These complex areas require extra attention due to their shapes and the thermal movement they experience.
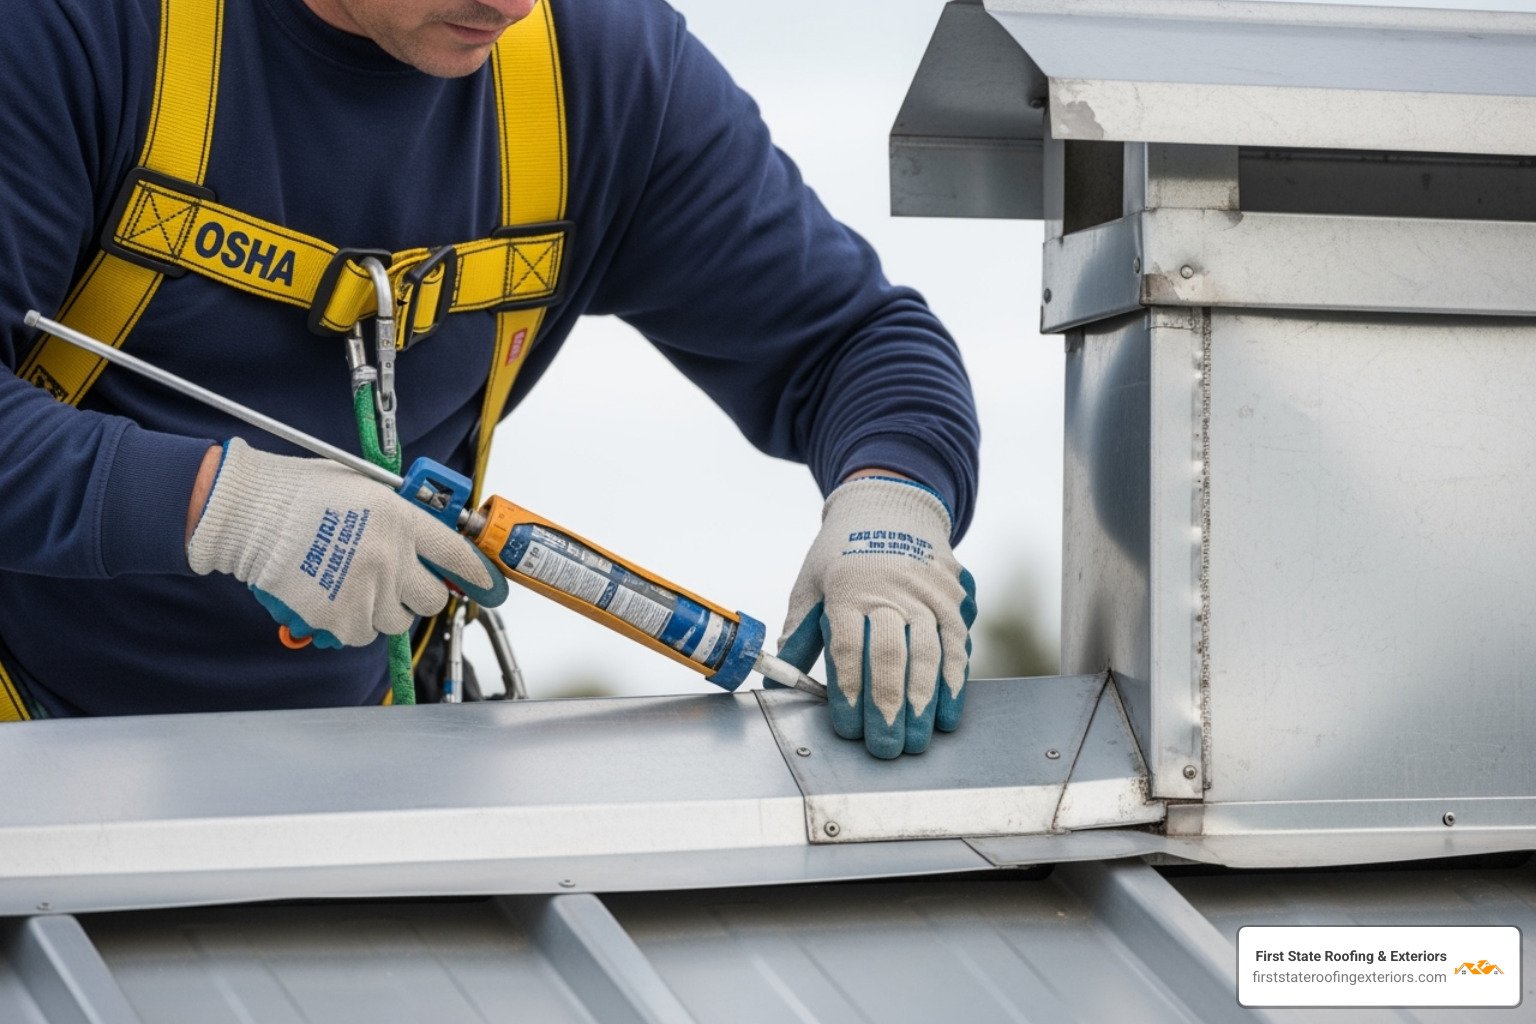
For vent pipes, start by checking if the rubber collar around your vent pipe is loose or cracked. Sometimes you can tap a loose collar back into place, but cracked collars need complete replacement. Seal gaps by applying a generous bead of butyl rubber caulk around the pipe base where it meets the flashing—cover the entire circumference.
Replacing a vent pipe boot follows similar steps to basic flashing replacement: remove covering shingles, pry up the old boot, clean thoroughly, install the new boot, reinstall shingles, and seal nail heads with roofing cement.
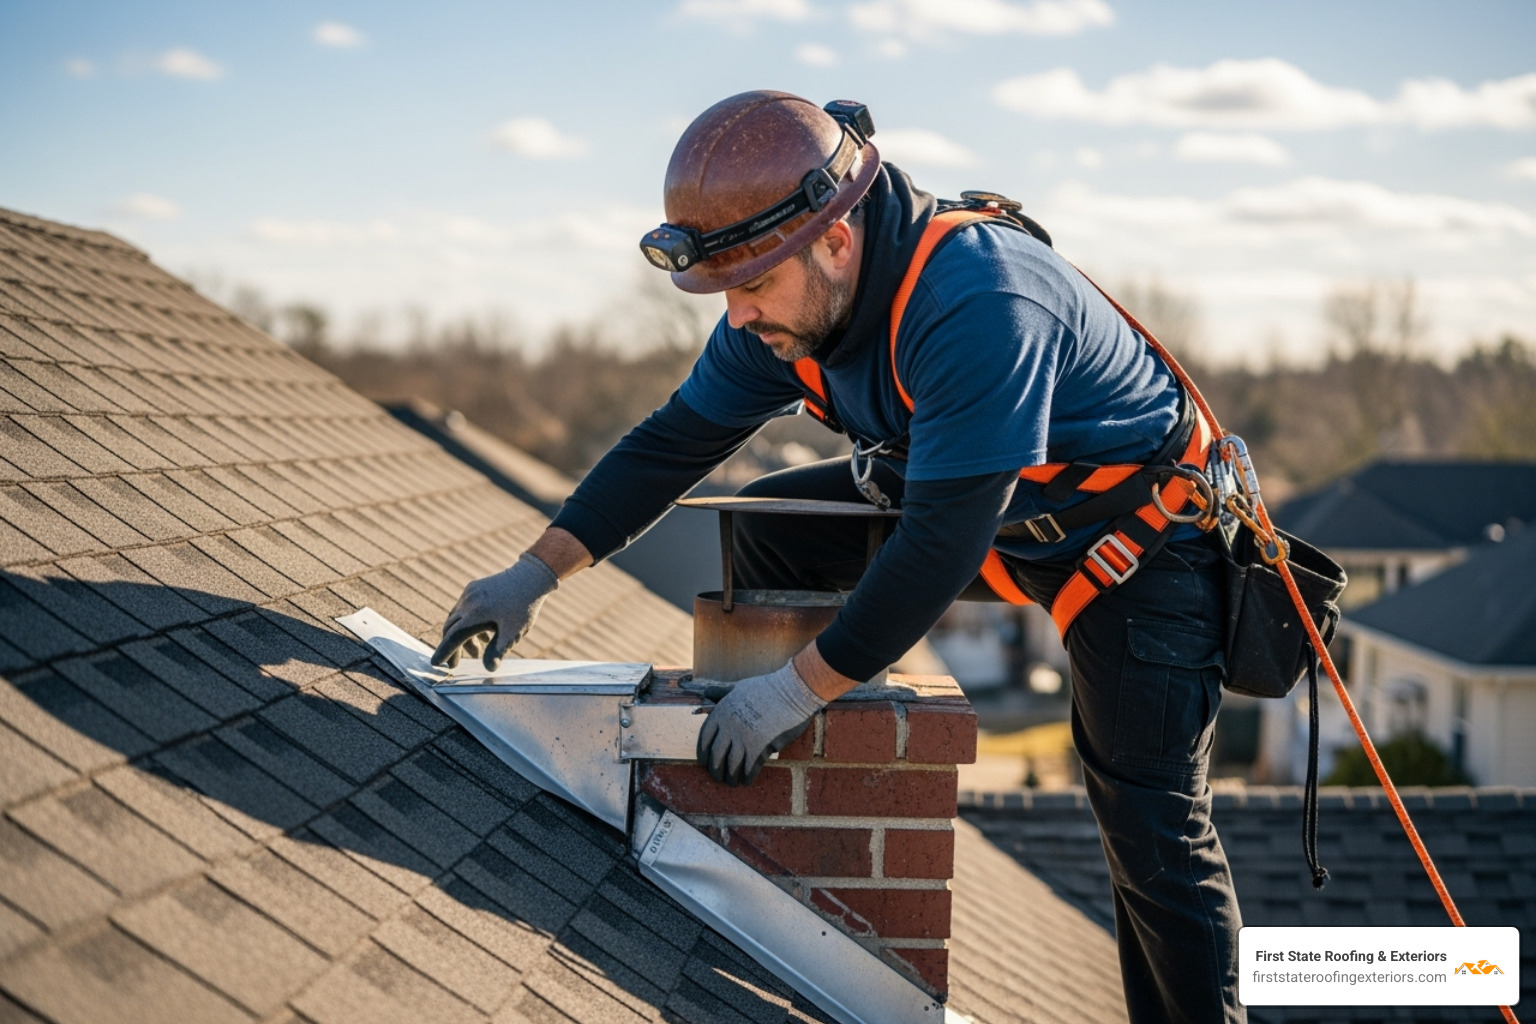
Chimney flashing involves a two-part system designed to handle different expansion rates between roof and chimney materials. Base flashing installs where the chimney meets the roof, interwoven with shingles. Counter flashing (cap flashing) is mortared into the chimney brickwork and folds down over base flashing.
For loose cap flashing, carefully clean out old mortar with hammer and chisel (wear those safety goggles!). Wet the joint, fill with new cement mortar, and press the flashing lip back into place. Once cured, caulk around the joint with butyl rubber caulk.
Seal all joints using high-quality masonry caulk where flashing meets chimney brickwork, and urethane roofing cement for seams between base and counter flashing. If your chimney mortar is crumbling, call a masonry professional—this contributes to leaks and needs expert repointing.
If you’re feeling overwhelmed by any of these steps, there’s no shame in calling for backup. Contact us at (302) 222-4065 for a free inspection and estimate. Sometimes the smartest DIY decision is knowing when to call the pros.
When to Call a Professional vs. DIY
While minor roof flashing repair can be a DIY task, knowing when to call in the experts is crucial for your safety and the long-term health of your roof.
Here’s a comparison to help you decide:
| Feature | DIY Repair | Professional Repair |
|---|---|---|
| Damage Extent | Small holes, minor cracks in sealant, loose edges | Extensive corrosion, large tears, structural damage, multiple leak points |
| Roof Pitch | Low-slope (walkable) roofs | Steep or high roofs where safety is a significant concern |
| Experience Level | Confident in basic roofing tasks, understanding of safety | Lack of experience, unsure about repair techniques, complex flashing systems |
| Safety Concerns | Minimal, with proper safety gear | Significant, involving heights, precarious positions, or specialized equipment |
| Tools Needed | Basic hand tools, common sealants | Specialized tools (e.g., metal brakes, soldering equipment), industrial-grade materials |
| Likely Cost | Materials only ($50-$200) | $200-$600 for minor repairs; $1,000+ for extensive repairs or replacements |
| Warranty | None | Often includes workmanship and material warranties |
| Long-Term Solution | Temporary to short-term for minor issues | Durable, long-lasting, and code-compliant solution |
Why professional help is often the best choice:
- Expertise: Professionals understand the nuances of different flashing types, materials, and installation techniques, including how to properly solder metal flashing for a durable, leak-proof seal. They know how to account for expansion and contraction.
- Safety: We have the training, equipment (including OSHA-mandated safety harnesses), and experience to work safely on roofs, especially steep or high ones.
- Comprehensive Assessment: We can identify underlying issues that might not be obvious to an untrained eye, preventing future problems.
- Quality Materials: We use high-quality, durable materials that are designed to last.
- Warranty: Professional repairs often come with a warranty on both materials and workmanship, offering you peace of mind.
- Cost-Effectiveness in the Long Run: While the initial cost may be higher, a professional repair prevents recurring issues and potentially more expensive water damage down the line. For a few hundred dollars, you can save yourself from thousands in water damage repairs.
The average cost of roof flashing repair can range from $200 to $600 for minor repairs, while more extensive repairs or replacements may cost upwards of $1,000 or more. This cost can vary depending on the extent of the damage, the type of flashing, and your location. For a precise estimate and to ensure your roof is in top shape, get a quote for professional roof repair services from us.
Proactive Care: Best Practices for Flashing Maintenance
Think of roof flashing repair as just one part of a bigger picture—ongoing maintenance that keeps your home’s protective barrier strong year after year. Your newly repaired flashing can last 20-30 years with proper care, but neglect it, and you’ll be back on that ladder sooner than you’d like.
Regular inspections are your best defense against surprise leaks. Make it a habit to check your roof twice yearly—once in spring to assess winter damage, and again in fall to prepare for harsh weather ahead. You don’t need to risk life and limb climbing around; a good pair of binoculars from the ground can reveal loose flashing, rust spots, or cracked sealant around chimneys and vents.
Gutter cleaning might seem unrelated to flashing, but clogged gutters create a domino effect of problems. When gutters overflow, water backs up onto your roof, pooling around flashing and gradually undermining even the best installation. Clean gutters twice a year, and your flashing will thank you.
Debris removal is equally important but often overlooked. Those autumn leaves that look so picturesque stuck around your chimney? They’re actually trapping moisture against your flashing, accelerating rust and deterioration. Clear away leaves, branches, and debris from valleys, vents, and chimney areas regularly.
Keep an eye on your seals and sealants. That bead of caulk you applied during your repair won’t last forever. Check it periodically for cracks or separation, especially after extreme temperature swings. When you spot problems, clean the area thoroughly and apply fresh sealant before water finds its way in.
Address minor issues promptly—this can’t be stressed enough. That tiny crack in your flashing sealant might seem insignificant now, but water has a way of turning small problems into big headaches. A fifteen-minute touch-up today beats a costly emergency repair tomorrow.
For Delaware homeowners, preventing ice dams deserves special attention. Proper attic insulation and ventilation prevent the freeze-thaw cycles that can force water under your carefully maintained flashing. If ice dams are a recurring problem, consider having a professional assess your attic’s ventilation system.
The beauty of proactive maintenance is that it’s mostly about paying attention. A few minutes of inspection and occasional minor touch-ups can extend your flashing’s life significantly and protect your investment for decades to come.
Learn more about our roof maintenance plans to keep your roof in peak condition year-round.
Your Local Experts in Roof Flashing Repair
When it comes to roof flashing repair, having a reliable local partner makes all the difference. A properly repaired and maintained roof flashing system truly serves as your home’s first line of defense against water damage—and we’ve seen how critical this protection is for Delaware homeowners.
While tackling minor flashing fixes can be a rewarding DIY weekend project, there’s real wisdom in knowing when to call in the professionals. Complex chimney flashing systems, steep roof pitches, or extensive damage simply require the expertise, specialized tools, and safety equipment that only experienced roofers bring to the job.
That’s where First State Roofing & Exteriors comes in. As a family-owned Delaware company, we understand the unique challenges our coastal weather presents to your home’s exterior. From the salt air near the coast to the freeze-thaw cycles inland, we’ve spent years mastering the art of roof flashing repair that stands up to whatever Mother Nature throws our way.
Our approach is built on integrity and transparency—no surprise charges, no pressure tactics, just honest assessment and quality workmanship. We’re available 24/7 because roofing emergencies don’t wait for business hours, and water damage certainly doesn’t pause for the weekend.
Don’t let a small leak become a major headache. If you’re in the Smyrna area and suspect your flashing might be compromised, waiting only makes the problem worse—and more expensive. Those water stains we talked about earlier? They’re your home’s way of asking for help.
Ready to protect your investment? Contact our team for a free, no-obligation estimate. Call us today at (302) 222-4065 to schedule your free inspection and ensure your home stays safe and dry. Find out more about your trusted Smyrna Roofer and find why your neighbors trust us with their most important investment—their home.
